Tag: Card Games

Where Can I Get My PlayStation 5 Fixed...
Experiencing hardware failures or unexpected crashes on your PlayStation 5 can bring your gaming sessions to a sudden halt. Knowing where to turn for reliable service ensures your console is safely restored to peak working condition without unnecessary delays. Exploring available fix pathways helps you select the best approach based on your warranty status and budget.
Official Sony Manufacturer Repairs
Submitting a repair request directly through official PlayStation support is often the safest path for complex hardware issues. If your console is still covered under the standard manufacturer warranty, Sony will usually repair or replace defective components at no extra cost. Out-of-warranty services are also available for a fixed fee, guaranteeing that certified technicians handle your system using genuine factory parts.
The official process typically requires shipping your console to an authorized service center after submitting an online ticket. While turn-around times can span a couple of weeks, opting for first-party service preserves system integrity and prevents compatibility errors down the line. It remains the most reliable choice for severe issues like motherboard failures or optical drive malfunctions.
Authorized Local Electronic Repair Shops
Independent repair stores offer a convenient local alternative for gamers seeking faster turn-around times for common hardware issues. Many reputable shops specialize in modern gaming hardware and can diagnose HDMI port damage, overheating, or power supply failures. Checking online reviews and technician certifications before dropping off your hardware helps ensure high-quality workmanship.
Working with local technicians often allows for direct communication regarding the specific symptoms your console is showing. Prices at third-party shops can be competitive, especially for straightforward mechanical fixes or cleaning services. However, using unapproved service providers may void any remaining manufacturer warranty on your device.
DIY Fixes and Common Maintenance
Certain minor PS5 issues can be safely addressed at home without sending the console away for professional servicing. Clearing accumulated dust from the interior fan vents often resolves severe overheating problems and loud cooling noise. Simple system software reinstalls via safe mode can also fix persistent crashing or software glitches.
Before attempting any home fix, it is essential to disconnect all power cables and work on a clean surface. Replacing external covers or adding an internal SSD storage expansion are user-friendly tasks designed for safe self-installation. For internal board repairs or complex solder work, professional intervention remains strongly recommended.
Key Considerations Before Choosing a Service
Evaluating total repair costs against the current price of a replacement console is a critical first step. You should always back up your save files and system data to cloud storage or an external drive before handing over your system. Verifying whether a service provider offers a labor and parts warranty provides extra peace of mind for your investment.

Rogue Trader Cassia Romance Guide Choices And Relationship...
Navigating romance in Warhammer 40,000: Rogue Trader offers players a rare chance to form deep personal connections amidst the grim darkness of the far future. Among the available romantic interests, Lady Navigator Cassia Orsellio presents a unique arc centered around courtly love, high nobility, and emotional vulnerability. Understanding how to choose the right dialogue options and maintain her courtly expectations is key to securing a fulfilling relationship progression with her.
Starting the Courtly Love Path with Cassia
Initiating a romance with Cassia requires the Lord Captain to approach her with utmost respect and poetic admiration. When she expresses insecurity about her physical mutations, reassuring her by emphasizing her true beauty is essential to unlocking romantic dialogue flags. Selecting traditional, noble courtly options (Amour Courtois) sets a foundation built on mutual respect rather than crude advances.
Navigating Key Dialogue Choices and Events
As you progress through the narrative, specific companion interactions act as milestones for her romance route. During Act II, engaging in literary discussions and sending gifts or letters to her quarters helps deepen the romantic connection. Players should ensure they support her during personal quests while avoiding overly direct or aggressive romantic demands that clash with her sheltered upbringing.
Crucial Act Requirements and True Romance Flags
Maintaining a smooth relationship progression requires careful attention to late-game companion requirements. Including Cassia in your active party during Chapter 3 is a vital prerequisite to avoid locking yourself out of her true romance ending path. Furthermore, making supportive decisions regarding her Navigator House duties allows the bond to survive the immense political pressures of her heritage.
Achieving a Lasting Romance Ending
In the final chapters of the story, resolving Cassia's personal conflict peacefully solidifies her commitment to the Lord Captain. Depending on whether you balanced her noble duties with personal affection, you can unlock a touching epilogue where your bond endures through time. This subtle and selfless connection remains one of the most rewarding narrative arcs in the entire Koronus Expanse.

How To Get In Bad Sport Lobby In...
Grand Theft Auto Online uses a matchmaking system designed to group aggressive players together in specialized servers known as Bad Sport lobbies. While most players aim to maintain Clean Player status, some are curious to experience the unique chaos or unlock exclusive cosmetic items like the dunce cap. Understanding how the game calculates bad sport points helps clarify what triggers this server relocation.
Destroying Personal Vehicles
The fastest and most common method to earn bad sport status involves repeatedly destroying personal vehicles belonging to other players. Each time a player blows up another user's personal ride, the game awards hidden penalty points toward their account status. Consistent vehicle destruction in public sessions rapidly pushes a player into the restricted lobby tier.
Players often coordinate with friends in Motorcycle Clubs to streamline this process by requesting personal bikes repeatedly. Destroying dozens of vehicles within a short window guarantees a swift transfer to the Bad Sport server environment. However, players should remember that insurance fees can accumulate quickly during this strategy.
Quitting Active Jobs and Missions Early
Leaving cooperative missions, competitive races, or heists while they are still active also generates bad sport penalties. Rockstar Games designed this feature to discourage players from abandoning teammates mid-game and ruining the match experience. Repeatedly exiting job lobbies or quitting during active gameplay slowly shifts an account toward bad sport classification.
While abandoning missions carries less penalty weight than vehicle destruction, frequent quitting still impacts account standing. Players attempting to enter bad sport lobbies strictly through job quitting will find it requires abandoning dozens of consecutive activities. Combining different disruptive behaviors remains the most effective method for triggering a lobby shift.
Player Reports and Vote-Kicking Mechanics
Receiving multiple vote-kicks from players in a single session also contributes to a player's bad sport score. When lobby members collectively vote to remove a disruptive player, the system logs a negative mark against that profile. Accumulating kicks across several sessions accelerates the transition into punishment lobbies.
In addition, players who accumulate formal reports for griefing or disruptive conduct face increased scrutiny from automated matchmaking filters. While reporting alone may not instantly banish someone, it complements other negative actions to trigger the bad sport threshold faster. Maintaining high aggression across multiple public lobbies ensures the system flags the account.
Consequences and Duration of Bad Sport Status
Entering a Bad Sport lobby alters the gameplay experience by forcing players to wear an unremovable dunce hat accessory. These lobbies are populated entirely by highly aggressive players, creating an environment focused almost purely on intense combat. Normal activities like peaceful business grinding become significantly harder due to non-stop lobby hostility.
Initial placement in a Bad Sport lobby typically lasts for two real-world days before the account returns to regular status. Subsequent offences increase the duration exponentially, sometimes trapping repeat offenders in bad sport pools for months. Players should weigh the novelty of the experience against the long-term restriction on normal online play.

Tales from the Borderlands Walkthrough and Complete Story...
Tales from the Borderlands stands out as one of the most compelling narrative-driven adventures in modern gaming, blending the signature humor of Pandora with deep character development. Following the intertwined journeys of Rhys, a ambitious Hyperion employee, and Fiona, a clever Pandoran con artist, the story delivers an unforgettable interactive experience. Navigating through its episodic structure requires understanding key decision points, fast-paced quick-time events, and character dynamics that shape the final outcome.
Understanding the Dual Perspective Narrative
The game structures its narrative around unreliable narrators, switching between Rhys and Fiona as they recount their versions of events to a mysterious captor. This unique storytelling device adds humor and complexity to every scene, as both characters exaggerate their actions to appear more heroic. Paying attention to dialogue choices allows players to shape the personal relationships between crew members throughout the five episodes.
While many choices offer immediate dialogue shifts, certain major decisions carry consequences that ripple into later chapters. Balancing loyalty between your companions and personal ambition creates a more satisfying overall story arc. Taking time to explore environments also uncovers hidden cash and lore details that enrich the journey.
Key Decision Points Across Episodes
Throughout the campaign, critical choices determine how characters perceive Rhys and Fiona, directly affecting available options in the climax. Deciding who to trust during high-stakes deals on Pandora sets the tone for future interactions. Managing your funds carefully as Fiona allows you to purchase customized outfits and cosmetic upgrades for Loader Bot.
In the middle episodes, navigating corporate politics and surviving desert chases demands quick reaction times during action sequences. Choosing how Rhys interacts with the digital remnant of Handsome Jack reshapes his career path and moral standing. These choices alter character alliances and pave the way for distinct narrative payoffs.
Assembling the Vault Hunter Team
The narrative culminates in a major showdown that requires recruiting a specialized team based on your choices throughout the campaign. Depending on how you treated various characters and how much money you accumulated, different companions become available for the final mission. Having a broad selection of allies provides unique strategic options during the final battle.
Ensuring positive relationships with key figures like Loader Bot, Athena, and Janey Springs unlocks their assistance when it matters most. Each recruited ally brings distinct combat abilities and comedic dialogue to the finale. This mechanic rewards players who carefully managed their diplomatic interactions across all five chapters.
Essential Survival and Exploration Tips
Succeeding in action sequences relies heavily on prompt inputs during dynamic quick-time events scattered throughout each episode. Rhys can scan objects with his cybernetic eye to reveal analytical data and funny commentary. Meanwhile, Fiona uses her keen observation skills and limited ammunition to overcome tricky environmental obstacles.
Thoroughly inspecting every area ensures you do not miss hidden loot caches or optional dialogue trees. Balancing humor with smart tactical choices creates the ultimate playthrough experience on Pandora. Following these principles allows players to enjoy the complete story while unlocking every major narrative branch.

Minecraft How To Allocate More RAM Improve Performance...
Minecraft is renowned for its vast sandbox environments and endless creative freedom, but expanding your world with custom mods, HD texture packs, and high render distances requires significant system resources. By default, the game launcher assigns a conservative amount of memory that may lead to stuttering, frame drops, or frequent memory allocation crashes during heavy gameplay. Learning how to allocate more RAM to Minecraft allows your system to handle complex chunk rendering and intensive gameplay elements much more smoothly.
Understanding Minecraft System Memory Requirements
Minecraft relies heavily on system memory to load entity data, render distant terrain, and process active redstone contraptions in real time. Standard vanilla installations run comfortably on two to four gigabytes, but heavily modded game clients or large server instances often demand considerably more capacity. Allocating additional memory provides the Java Virtual Machine with enough headroom to process asset updates without causing sudden frame spikes.
Modifying RAM Allocation in the Default Minecraft Launcher
Adjusting memory settings within the official launcher is a straightforward process that takes only a few simple steps. Navigate to the Installations tab at the top of the launcher window, select your active profile, and open the Advanced Options section. Locate the JVM Arguments field and modify the initial memory flag, changing the default value to match the desired number of gigabytes your system can safely spare.
Determining the Ideal Amount of Memory to Allocate
While increasing system resources improves overall stability, assigning too much memory can sometimes lead to unexpected performance degradation due to Java garbage collection cycles. A general rule of thumb is to dedicate roughly half of your total system physical memory to the game client, leaving sufficient resources for your operating system and background applications. For most modern gaming builds featuring sixteen gigabytes of system memory, assigning six to eight gigabytes provides optimal gameplay stability.
Optimizing Third Party Launchers and Custom Modpacks
If you launch your game using popular third-party client managers, adjusting memory limits is often integrated directly into the general settings menu. These specialized platforms feature dedicated sliders that allow players to configure maximum memory limits visually without editing complex command lines. Fine-tuning these values ensures smooth performance across heavy modded environments while keeping your system balanced and responsive during long sessions.

Last Voyage Of The USS Constitution History And...
The USS Constitution stands as one of the most celebrated vessels in maritime history, renowned for its formidable role in early American naval strategy. Before transitioning into its modern status as a preserved historical flagship, the frigate carried out crucial operational assignments across global waters. Examining its final active deployment offers valuable insight into how this legendary warship concluded its operational career.
The Operational Background of the Historic Frigate
Launched in 1797, the heavy frigate earned widespread fame during the War of 1812 for its structural resilience and undefeated combat record. Over the following decades, the vessel served across multiple squadrons to protect trade routes and represent American interests abroad. These diplomatic and patrol assignments demonstrated the nation's growing naval authority during the nineteenth century.
The Final Operational Patrol with the African Squadron
During the early 1850s, the USS Constitution was assigned to the African Squadron to enforce maritime law and curb illegal traffic. In November 1853, the ship secured its final prize by capturing the illegal vessel H.N. Gambrill off the coast of Africa. This successful interception marked the conclusion of the frigate's active combat and enforcement history.
Transitioning from Active Service to Historic Legacy
Following its operational return to the United States, the frigate was decommissioned from active combat duty in 1860. It soon assumed new responsibilities, serving as a training vessel for naval academy cadets and participating in ceremonial duties. Later restorations transformed the iconic ship into a national museum that continues to educate millions of visitors today.
Preserving Maritime Heritage at Charlestown Navy Yard
Today, the historic frigate remains docked at the Charlestown Navy Yard in Boston, maintaining its status as the world's oldest commissioned warship afloat. Active-duty Navy personnel maintain the vessel and lead educational tours to highlight early American naval achievements. Readers interested in historic naval journeys can explore related topics like the Last Voyage Of The USS Constitution History And Final Mission to learn more.
Conclusion and Historical Significance
The legacy of the USS Constitution reflects a remarkable journey from frontline naval defense to global educational outreach. Its final operational voyage marked the end of a storied combat era while laying the foundation for long-term preservation. Today, the vessel endures as an enduring symbol of naval craftsmanship and military history.

All 40 Foods In Minecraft And What Each...
Managing hunger is a fundamental mechanic in Minecraft that directly affects player survival, health regeneration, and sprinting capabilities. Across the vast sandbox world, players can discover and consume forty distinct edible items that fulfill varying nutritional needs. Understanding how each food functions helps adventurers optimize their resource management during long mining trips or intense boss battles.
Farming Staples and Raw Harvests
Basic agricultural crops provide accessible nourishment during the early stages of a survival world. Staples such as apples, carrots, potatoes, and beetroot offer immediate hunger recovery when eaten raw, though their saturation benefits remain minimal. Sweet berries and glow berries serve as quick wild snacks that can also be cultivated for aesthetic lighting or breeding mechanics.
Certain raw foods carry inherent risks that players must carefully consider before eating. Raw chicken, pufferfish, spider eyes, and rotten flesh can induce negative status effects such as hunger or poison. Melons and dried kelp offer fast consumption times, making them excellent choices for quick energy restoration while actively exploring hazardous caves.
Cooked Meats and High-Saturation Meals
Preparing raw animal meats in a furnace or smoker significantly boosts their dietary efficiency for long journeys. Cooked porkchops, cooked beef, and cooked mutton stand among the highest saturation foods available in the game. Consuming these hearty meals keeps the hunger bar filled longer and accelerates natural health regeneration during combat.
Seafood options provide a reliable alternative for players building coastal bases or exploring ocean monuments. Cooked cod and cooked salmon deliver solid saturation values while remaining easy to harvest through fishing or aquatic hunting. Cooked rabbit and cooked chicken also offer dependable nutritional returns compared to their raw counterparts.
Crafted Recipes and Culinary Options
Combining multiple ingredients allows players to prepare complex recipes with unique advantages. Items like bread, pumpkin pie, and cookies utilize wheat and sugar to create portable rations that are easy to store in large stacks. Mushroom stew, rabbit stew, and beetroot soup require bowls and offer impressive hunger restoration, though they do not stack in inventory slots.
Suspicious stew represents one of the most versatile culinary items due to its unique status effects. Depending on the flower used during crafting, this dish can bestow temporary benefits like night vision, jump boost, or fire resistance. Golden carrots remain a top-tier option among experienced players due to their unparalleled saturation properties.
Magical Edibles and Utility Foods
Special foods infused with gold or Ender energy grant powerful defensive capabilities during endgame encounters. Golden apples provide immediate absorption hearts and regeneration, making them vital tools when fighting dangerous bosses. Enchanted golden apples offer even stronger status buffs, granting resistance and fire protection during extreme danger.
Chorus fruit introduces a unique mobility mechanic by teleporting the player to a random nearby location upon consumption. Meanwhile, milk buckets instantly clear all active status effects, offering crucial relief against severe curses or venom. Mastering the diverse buffet of options ensures players remain well-fed and prepared for every challenge across all dimensions.

Controller Wont Connect To PS4 And How To...
Experiencing connectivity issues with your PlayStation 4 DualShock 4 controller can disrupt your gaming sessions and cause unnecessary frustration. Whether the controller flashes white, blue, or fails to respond entirely, pairing conflicts and signal interference are common culprits. Understanding how to address these hardware and software glitches ensures you can quickly restore a stable connection to your console.
Inspecting the Micro-USB Cable and Port Hardware
The most straightforward method to resolve pairing failures involves establishing a direct wired connection between the gamepad and the console. Not all micro-USB cables carry data signals, as many inexpensive cords are designed solely for battery charging. Using a high-quality data-capable USB cable allows the console to recognize the controller's internal interface immediately.
Physical debris accumulated inside the charging port can also prevent proper electrical contact. Carefully inspect the micro-USB port on the front of the controller and the USB slots on the console for dust or lint. Cleaning these ports gently with compressed air can resolve intermittent connection drops without requiring hardware replacements.
Performing a Hard Reset on the DualShock 4 Controller
When software glitches prevent the gamepad from communicating via Bluetooth, triggering a manual hardware reset often restores default functionality. Turn off the PlayStation 4 completely and disconnect it from power to clear cached wireless profiles. Locate the small reset pinhole near the L2 button on the back of your controller.
Insert a straightened paperclip into the hole, pressing down on the internal button for at least five seconds. After releasing the button, reconnect the controller using your USB cable and power on the console. Pressing the PS button should now re-establish the primary pairing profile smoothly.
Managing Bluetooth Connections in Safe Mode
If standard sync attempts fail, launching the PlayStation 4 in Safe Mode bypasses standard system software conflicts. Power down the console entirely, then press and hold the power button until you hear a second beep after seven seconds. Connect your DualShock 4 controller using a reliable USB cable and press the PS button to access the system menu.
From the Safe Mode options, select the option to restart the system or rebuild the database to clear corrupted system settings. This diagnostic environment forces the console to reload its core hardware drivers, allowing fresh peripheral registrations. Once the system reboots normally, your controller should maintain a steady wireless bond.
Clearing Saved Devices and Addressing Wireless Interference
Bluetooth signal congestion caused by nearby wireless routers, mobile phones, or smart home electronics can interfere with controller connectivity. Navigating to the console's device settings using a secondary controller or remote allows you to delete registered controller profiles. Removing old Bluetooth devices forces the console to accept the controller as a completely new device upon re-pairing.
Positioning your PlayStation 4 away from major sources of electronic interference significantly improves signal stability. Maintaining a clear line of sight between the gamepad and the front receiver panel reduces latency and unexpected disconnects. Following these maintenance steps ensures long-term reliability for all your gaming equipment.

Controller Wont Connect To PS4 And How To...
Experiencing connectivity issues with your PlayStation 4 DualShock 4 controller can disrupt your gaming sessions and cause unnecessary frustration. Whether the controller flashes white, blue, or fails to respond entirely, pairing conflicts and signal interference are common culprits. Understanding how to address these hardware and software glitches ensures you can quickly restore a stable connection to your console.
Inspecting the Micro-USB Cable and Port Hardware
The most straightforward method to resolve pairing failures involves establishing a direct wired connection between the gamepad and the console. Not all micro-USB cables carry data signals, as many inexpensive cords are designed solely for battery charging. Using a high-quality data-capable USB cable allows the console to recognize the controller's internal interface immediately.
Physical debris accumulated inside the charging port can also prevent proper electrical contact. Carefully inspect the micro-USB port on the front of the controller and the USB slots on the console for dust or lint. Cleaning these ports gently with compressed air can resolve intermittent connection drops without requiring hardware replacements.
Performing a Hard Reset on the DualShock 4 Controller
When software glitches prevent the gamepad from communicating via Bluetooth, triggering a manual hardware reset often restores default functionality. Turn off the PlayStation 4 completely and disconnect it from power to clear cached wireless profiles. Locate the small reset pinhole near the L2 button on the back of your controller.
Insert a straightened paperclip into the hole, pressing down on the internal button for at least five seconds. After releasing the button, reconnect the controller using your USB cable and power on the console. Pressing the PS button should now re-establish the primary pairing profile smoothly.
Managing Bluetooth Connections in Safe Mode
If standard sync attempts fail, launching the PlayStation 4 in Safe Mode bypasses standard system software conflicts. Power down the console entirely, then press and hold the power button until you hear a second beep after seven seconds. Connect your DualShock 4 controller using a reliable USB cable and press the PS button to access the system menu.
From the Safe Mode options, select the option to restart the system or rebuild the database to clear corrupted system settings. This diagnostic environment forces the console to reload its core hardware drivers, allowing fresh peripheral registrations. Once the system reboots normally, your controller should maintain a steady wireless bond.
Clearing Saved Devices and Addressing Wireless Interference
Bluetooth signal congestion caused by nearby wireless routers, mobile phones, or smart home electronics can interfere with controller connectivity. Navigating to the console's device settings using a secondary controller or remote allows you to delete registered controller profiles. Removing old Bluetooth devices forces the console to accept the controller as a completely new device upon re-pairing.
Positioning your PlayStation 4 away from major sources of electronic interference significantly improves signal stability. Maintaining a clear line of sight between the gamepad and the front receiver panel reduces latency and unexpected disconnects. Following these maintenance steps ensures long-term reliability for all your gaming equipment.

Hogwarts Legacy Headmaster Office Location And How To...
Exploring the sprawling grounds of Hogwarts Castle in Hogwarts Legacy leads players to many secret locations and hidden rooms. Among the most sought-after destinations is the Headmaster's Office, situated at the very apex of the castle. Finding this restricted area allows players to complete story objectives, collect rare loot, and unlock castle secrets.
Where to Find the Headmaster's Office in Hogwarts Castle
The Headmaster's Office is located at the highest point of the Grand Staircase Tower in Hogwarts Castle. To reach the general vicinity, players must navigate through the Grand Staircase and climb up toward the Trophy Room area. Beyond the Trophy Room, a winding corridor leads to the gargoyle statue that guards the entrance to the office.
Locating the gargoyle is straightforward once you fast travel to the Trophy Room Floo Flame. From there, head through the display hallways and continue upwards along the stone staircases. The entrance gargoyle stands at the end of the highest interior pathway.
Standard Method to Access the Office Through Story Quests
The primary and intended route into the Headmaster's Office requires progressing through the main storyline. During Niamh Fitzgerald's Trial quest, players learn the secret password required to move the gargoyle. Speaking the password causes the gargoyle to spiral upward, revealing the entrance staircase.
This method ensures you can explore the office naturally during campaign progression. Inside, you will find important story elements, collectible items, and access to upper balconies. Following the main story remains the most reliable path for all players.
Alternative Flying Method Using the Outer Balcony
For players who want to reach the area earlier, an alternative route exists using a flying broom. By flying to the top of the highest tower, you can spot an exterior balcony attached to the Headmaster's quarters. Landing on this balcony allows you to bypass the gargoyle entrance down below.
To enter through the balcony doors, players must have upgraded their lockpicking ability with Alohomora level 3. Unlocking the door provides direct access to the interior rooms and upper study. Keep in mind that some areas inside may remain locked until specific quests are active.
Unlocking the Key of Admittance and Castle Secrets
Once inside the Headmaster's Office, players can find the Key of Admittance resting on a desk in the upper room. This special key is required to open the massive locked door across from the gargoyle entrance. Unlocking that door reveals a hidden staircase leading to a rare field guide page and collectible chests.
Retrieving this key and exploring the secret room completes one of the official Hogwarts Castle Secrets challenges. It offers valuable rewards and cosmetic items for dedicated completionists. Taking the time to search every corner of the office guarantees you do not miss any high-tier loot.

GTA V PS5 Graphics Modes And The Differences...
Grand Theft Auto V on PlayStation 5 offers players enhanced visuals and performance options tailored to different gaming preferences. Understanding how each graphics mode alters frame rates and image clarity helps players choose the best setup for exploring Los Santos.
Fidelity Mode for Maximum Visual Detail
Fidelity Mode targets native 4K resolution at a steady 30 frames per second to deliver the crispest image possible. This setting enables ray-traced reflections and high-quality shadow effects across the entire map.
Players who prefer detailed scenic views, realistic lighting, and dense environmental textures will benefit most from this option. However, the lower frame rate can make fast-paced driving and gunplay feel less responsive compared to higher performance modes.
Performance Mode for Smooth Gameplay
Performance Mode prioritizes motion fluidness by targeting 60 frames per second at an upscaled 4K resolution. By sacrificing some ray-tracing features and visual fidelity, it delivers significantly smoother responsiveness during intense combat and high-speed chases.
This mode is ideal for action-focused players who value input speed and fluid movement over minor graphical details. Navigating busy city intersections and engaging in frantic firefights feels noticeably more seamless in this configuration.
Performance RT for the Best Balanced Experience
Performance RT blends the benefits of both settings by targeting 60 frames per second while retaining selective ray-tracing capabilities. It dynamically scales resolution to maintain a stable frame rate while adding enhanced lighting and realistic reflections to urban surroundings.
For most players, this setting offers the ideal compromise between graphical beauty and high-frame-rate fluidity. It brings out the atmosphere of Night City and Los Santos without sacrificing responsiveness.
Choosing the Right Setting for Your Playstyle
Selecting the best graphics mode depends on whether you value cinematic presentation or fluid controller feedback. Gamers using larger displays may prefer Fidelity Mode for its sharp resolution, while those playing on high-refresh-rate monitors often lean toward Performance options.
Testing each setting in different scenarios, such as daytime driving or nighttime rainstorms, allows you to determine which visual tradeoff feels right. Switching between modes is quick and straightforward through the in-game display settings menu.

Todays Florida Winning Lottery Numbers and How to...
Florida lottery players eagerly check drawing results every day to see if their chosen numbers match the winning combinations. With various games ranging from multi-state jackpots like Powerball and Mega Millions to daily local draws like Pick 2, Pick 3, Pick 4, Pick 5, and Cash3Life, keeping track of the latest outcomes requires reliable resources. Knowing where and how to verify your tickets quickly ensures you never miss out on a potential prize.
Official Methods for Verifying Florida Lottery Numbers
The most accurate way to confirm winning numbers is through official Florida Lottery channels. The official state lottery website posts updated draw results shortly after each drawing finishes. Players can also download the mobile application to scan ticket barcodes directly using a smartphone camera for immediate confirmation.
In addition to online resources, authorized lottery retailers across the Sunshine State provide dedicated ticket checker terminals. You can hand your ticket to a store clerk or use self-service kiosks to verify your numbers. Local television broadcasts also air live drawing segments during scheduled evening timeslots.
Understanding Daily Drawing Schedules and Game Types
Florida offers multiple daily draws that take place twice per day, including midday and evening sessions. Games like Pick 3 and Pick 4 offer frequent opportunities for smaller prizes, making them popular among regular participants. Larger terminal games, including Florida Lotto and Jackpot Triple Play, hold drawings on specific nights during the week.
Understanding the exact drawing time for your specific game helps you check results without unnecessary delay. Players should always ensure they are reviewing results for the correct draw date and time session. Keeping your ticket in a safe location until verification is complete is essential for securing any winnings.
Tips for Safe Digital Verification and Online Tracking
While checking official state results is essential, many online gaming enthusiasts also follow broader entertainment trends. Platforms such as m88 illustrate how modern digital portals offer streamlined interfaces for users tracking statistical outcomes and real-time updates. Utilizing trustworthy, well-structured digital platforms helps ensure you receive accurate data without relying on unverified third-party rumors.
When using third-party websites or news outlets to view draw figures, always cross-reference the numbers with official state databases. Setting up email or mobile notification alerts through verified channels can streamline the process further. This proactive approach saves time and minimizes the risk of misreading winning combinations.
Steps to Take After Discovering a Winning Ticket
If your numbers match today's winning combination, sign the back of your physical ticket immediately to establish ownership. Smaller prize amounts under six hundred dollars can typically be redeemed at any authorized Florida Lottery retailer. For larger jackpots, players must submit a claim form through district offices or state lottery headquarters.
Be mindful of expiration deadlines, as Florida lottery tickets generally remain valid for 180 days from the draw date. Keeping physical tickets stored away from heat and moisture prevents physical damage that could complicate validation. Following proper claim procedures ensures a smooth payout process for all valid winners.

How To Grow Coral In Minecraft Guide
Coral blocks bring vibrant life and color to underwater landscapes across aquatic biomes. Learning how to grow coral in Minecraft allows players to generate endless aquatic decorations for aquariums and ocean bases. By understanding the mechanics of ocean vegetation, you can easily set up a renewable source for your marine projects.
Understanding Coral Spawning Mechanics
In Minecraft, full coral blocks do not grow or expand naturally after world generation. Instead, players grow coral plants, coral fans, and seagrass on aquatic surfaces. Using bone meal under water creates these colorful organisms on dirt, sand, or gravel blocks.
When applying bone meal underwater, the game randomly chooses between generating seagrass or various coral variants. Warm ocean biomes naturally feature these formations, but players can duplicate fans and plants anywhere underwater. This mechanic makes farming aquatic plants simple once you have a steady supply of bones.
How to Cultivate Coral Fans and Plants
To start growing coral fans, submerge a layer of dirt or sand underwater in your chosen location. Right-click the block while holding bone meal to sprout marine vegetation instantly. You will see a mix of seagrass alongside vibrant coral fans sprouting across the surface.
To collect the newly grown coral items intact, you must use a tool enchanted with Silk Touch. Breaking coral without Silk Touch will destroy the item completely. Gathering these blocks allows you to decorate custom aquatic builds or custom fish tanks.
Keeping Coral Alive and Alive in Builds
Coral requires direct contact with a water source block to maintain its vibrant color. If placed on dry land or away from water, it turns into gray dead coral within seconds. Always ensure your decorative designs keep the blocks properly hydrated.
You can also place coral fans onto waterlogged blocks like slabs, stairs, or fences. This technique allows builders to construct unique underwater displays without causing the plants to dry out. Proper hydration management ensures your decorative ocean builds stay colorful permanently.
Setting Up an Efficient Manual Coral Farm
A simple coral farming setup uses dispenser systems or simple bone meal farming underground. By standing underwater and repeatedly applying bone meal to a central block, you can quickly harvest new sprouts. Combining this method with a Silk Touch pickaxe provides high yield per minute.
Using these strategies gives players total control over their aquatic inventory. Whether you are creating elaborate aquariums or ocean monuments, cultivating coral offers unlimited aesthetic possibilities.

What Does Clearing System Cache Do PS5 Benefits...
PlayStation 5 users often encounter occasional system sluggishness, minor UI delays, or sudden game crashes during extended play sessions. Understanding how to clear system cache on your PS5 can serve as a vital troubleshooting step to keep the console running efficiently without deleting personal data. This quick process removes temporary files that may have become corrupted over time.
What Is the PS5 System Cache
The system cache on a PS5 is a dedicated storage space used by the operating system to hold temporary files, short-term data, and quick-launch instructions. By storing these temporary elements, the console can access system features and load background data much faster during regular operation. However, when these temporary files accumulate or become corrupted after major updates, performance can begin to suffer.
Key Benefits of Clearing Your Console Cache
Clearing the cache helps resolve mysterious menu lag, app freezing, and random game crashes by wiping out unstable temporary data. It forces the operating system to rebuild fresh files, which frequently restores smooth navigation across the home screen. Additionally, it can fix minor network synchronization errors that prevent titles from connecting smoothly to online servers.
What Happens to Your Games and Save Data
One major concern for players is whether clearing the cache will result in lost progress or deleted games. Wiping the system cache does not delete installed game files, media captures, user profiles, or saved game data. It strictly targets temporary system files, making it a safe maintenance task when troubleshooting performance drops.
How to Safely Access PS5 Safe Mode
To clear the system cache, you must boot your console into Safe Mode by turning it completely off and then holding the power button until you hear two distinct beeps. Once connected via a USB cable, select the option for Clear Cache and Rebuild Database, followed by Clear System Software Cache. Your PS5 will automatically restart, leaving your console refreshed and ready for your next gaming session.

Where To Find Chickens Sea Of Thieves And...
Tracking down animals in Sea of Thieves can sometimes feel confusing, especially when completing voyages for the Merchant Alliance. Knowing exactly where to look for chickens saves valuable sailing time and ensures you meet your delivery deadlines efficiently. Understanding animal spawn behaviors across different regions helps players become much more effective traders.
Top Islands to Find Chickens in Sea of Thieves
Chickens inhabit specific islands across all major regions in the game. Popular locations in The Ancient Isles include Chicken Isle, Crook's Hollow, and Barnacle Cay. If you are exploring The Shores of Plenty, check out Cannon Cove, Smuggler's Bay, or Twin Groves for steady spawns.
In The Wilds region, players can reliably discover chickens on Old Faithful Isle, Marauder's Arch, and Shipwreck Bay. Knowing these primary hubs keeps your voyage routes organized and reduces unnecessary navigation between distant islands.
How Chicken Spawns and Variants Work
Chickens appear in four distinct breeds: White Feathered, Red Speckled, Black Plumed, and Golden. Golden chickens yield the highest gold payout when requested by a active Merchant Alliance contract. It is useful to remember that animal spawns are procedural upon approaching an island, meaning specific breeds might vary between visits.
If you reach a designated island and do not find the required chicken variant, reset the island by sailing away or visiting the Ferry of the Damned. Once you return, new animals will spawn in their place.
Best Practices for Capturing and Transporting Chickens
Before catching chickens, players must pick up chicken coops from a Merchant Alliance representative at any outpost. Holding the coop while approaching a chicken allows you to hold the interaction button to capture it safely. Unlike pigs, chickens do not require food while caged, making long voyages much easier to manage.
Be careful when transporting caged chickens back to your ship, as taking environmental damage or drowning in deep water will kill them. Store your captured coops in safe areas on board away from potential cannon fire during combat encounters.
Maximizing Merchant Alliance Rewards
Turning in chickens without an active contract nets significantly less gold compared to commissioned deliveries. Always verify your voyage details to deliver the correct chicken variants to the specified outpost before time expires. Leveraging efficient trade routes will quickly boost your overall reputation with the Merchant Alliance.

Best Character In Diablo 3 Class Strengths And...
Choosing the best character in Diablo 3 depends largely on your preferred combat style and endgame objectives. Each hero class introduces unique resource systems, skill synergies, and survival mechanics that dramatically shape the gameplay experience. Understanding how these classes differ helps players select the right hero for solo progression or cooperative rift running.
Frontline Melee Powerhouses
The Barbarian and Crusader represent the heavy armor melee options designed to dive straight into thick monster packs. Barbarians build up Fury through dealing and taking damage, unleashing devastating physical attacks and high-mobility leaps across the battlefield. Meanwhile, Crusaders combine high defensive capabilities with holy magic, offering incredible mobility and strong area control using specialized shield sets.
Agile and Fast-Paced Combatants
For players who value speed and tactical positioning, the Demon Hunter and Monk provide exceptionally dynamic combat options. Demon Hunters manage dual resources—Hatred and Discipline—allowing them to vault around enemies while raining down deadly ranged attacks. Monks utilize Spirit to perform lightning-fast martial strikes, group healing, and rapid mobility skills that keep them constantly in motion.
Arcane and Elemental Spellcasters
Ranged magic specialists like the Wizard and Necromancer wield immense power from safe distances. Wizards rely on fast-regenerating Arcane Power to summon elemental storms, mirror images, and explosive area-of-effect spells. Necromancers command bone armor and terrifying undead minions, sacrificing health or utilizing corpses to obliterate entire screens of monsters.
Minion Masters and Voodoo Magic
The Witch Doctor stands out as a unique summoner class that relies on pets and dark voodoo curses. By summoning zombie dogs, gargantuans, and fetishes, this class lets companions absorb incoming damage while dealing steady damage from behind. Players seeking a distinctive tactical playstyle often analyze options to determine which class offers the ideal balance of defense and damage.
Evaluating the Overall Best Class
Ultimately, there is no single best character because class balance in Diablo 3 allows every hero to thrive in high-level content. The right choice comes down to whether you prefer close-range brawling, rapid ranged bombardment, or controlling the battlefield with summons. Experimenting with different classes during seasonal play remains the best way to discover your personal favorite.

Big The Cat Sonic Adventure Character And Story...
Big the Cat remains one of the most distinctive and memorable characters introduced in Sonic Adventure for the Sega Dreamcast. Known for his relaxed demeanor and massive physical size, Big offers a stark contrast to the high-speed action typically associated with the Sonic the Hedgehog franchise. Understanding his story arc and unique gameplay mechanics provides fans with a deeper appreciation of the classic title's diverse structure.
The Origins and Persona of Big the Cat
Big the Cat resides in the tranquil surroundings of Mystic Ruins alongside his closest companion, a frog named Froggy. He leads a gentle and uncomplicated life focused primarily on fishing and enjoying the peaceful atmosphere of his forest home. Despite his intimidating physical stature, Big possesses a kind, gentle heart and demonstrates immense loyalty toward his friends.
His gentle nature is reflected in his calm speech patterns and simple motivations throughout the campaign. He is unconcerned with global threats or power struggles, caring only about the safety and well-being of Froggy. This simplistic outlook makes him a unique emotional anchor amidst the chaos unfolding around the main cast.
Big's Story Arc in Sonic Adventure
The central narrative of Big's campaign begins when Froggy unexpectedly swallows a Chaos Emerald along with the tail of the mystical entity Chaos. Under this strange influence, Froggy sprouts a tail and hops away, forcing Big to embark on an urgent quest across various environments to rescue his friend. His journey takes him from Emerald Coast to the bustling streets of Station Square and even aboard Dr. Eggman's Egg Carrier.
Along his path, Big unknowingly intersects with other main heroes, including Sonic and Tails, as they battle Eggman's forces. His campaign culminates in a tense confrontation where Chaos absorbs Froggy to regain power, requiring Big to rescue his friend once and for all. After successfully saving Froggy with the help of Sonic, Big safely returns to his quiet life in the Mystic Ruins.
Unique Fishing Gameplay Mechanics
Unlike the fast-paced platforming stages of other characters, Big's gameplay revolves entirely around fishing mechanics using his trusty rod. Players must navigate stages to find water bodies, cast their line, and lure Froggy toward the hook. Managing line tension and carefully reeling in catches are essential skills for completing his story objectives.
Throughout the adventure, players can discover hidden lure upgrades scattered around the hub worlds. These upgrades extend cast distances and increase the likelihood of attracting larger fish along with Froggy. Mastering these fishing controls allows players to clear his stages smoothly and earn higher emblem rankings.
Legacy and Reception in the Sonic Franchise
Upon initial release, Big's campaign received mixed reactions due to its drastic departure from traditional Sonic gameplay. However, over time, the gaming community has embraced Big as a beloved cult icon within the broader franchise. His unexpected charm and humorous presence have earned him recurring cameo appearances in subsequent Sonic media and spinoff games.
Ultimately, Big the Cat represents Sega's bold willingness to experiment with varied gameplay styles during the Dreamcast era. His storyline adds emotional heart and variety to Sonic Adventure, ensuring his enduring status as a iconic character in platforming history.

God Of War 2018 Niflheim Cipher Locations And...
Unlocking optional realms in God of War 2018 requires Kratos and Atreus to decipher ancient languages scattered across Midgard. Among these hidden lands, Niflheim offers some of the most rewarding endgame challenges and powerful equipment available in the game. To gain access, players must locate four specific cipher pieces hidden inside distinct purple chests.
Understanding the Niflheim Language Ciphers
Unlike standard treasure containers, cipher chests feature a unique purple glow with a distinct face emblem on top. While there are more than four chests hidden throughout the world, you only need to collect four ciphers to fully decipher the language. Once you assemble all four pieces, Atreus learns the script, allowing the realm table in Tyr's Temple to align with Niflheim.
Where to Find Niflheim Cipher Chests in Midgard
Several cipher chests become accessible once the Lake of Nine's water level drops for the second time. One common location is at the Lookout Tower beach, where players must clear spike traps using axe spins to reach the chest. Another piece can be found near the Ruins of the Ancient in the northern stretch of the lake after defeating a patrolling Frost Ancient.
Additional chests reside in high-altitude zones like the Mountain Summit near Sindri's shop after clearing story obstacles. Exploring the Council of Valkyries and surrounding shores can also yield extra chests if you miss earlier opportunities. Collecting these pieces guarantees progress toward reading the ancient Norse runes correctly.
Story-Locked Ciphers and Late-Game Access
Certain Niflheim ciphers cannot be retrieved during early exploration because they are tied directly to late-game main quests. For instance, a cipher chest sits inside the Hall of Tyr during the quest to flip the realm travel room. Another critical chest rests inside the belly of the World Serpent when retrieving Thor's statue eye late in the narrative.
Players who miss these narrative-specific containers do not need to worry about permanent lockouts. The game dynamically converts remaining unopened chests into standard loot containers once the language is completed. This design ensures that every player can eventually collect the required four pieces regardless of their exploration order.
How to Unlock and Access the Realm of Niflheim
After Atreus successfully translates the four cipher pieces, travel directly to the Realm Travel Room in Tyr's Temple at the center of Midgard. Select Niflheim on the table interface to consume the realm travel crystal and align the bridge. Crossing the portal transports Kratos to a mist-shrouded realm governed by Ivaldi's dangerous workshop.
Inside Niflheim, players encounter procedural maze challenges that test combat endurance under a timer enforced by toxic mist. Collecting Mist Echoes inside the maze allows you to craft top-tier armor and unlock secret central chamber rewards. Successfully unlocking this realm also grants the Trilingual trophy for dedicated completionists.

Where Is The Legendary Gator RDR2 Location And...
The Legendary Alligator, also known as the Legendary Bull Gator, is one of the most imposing creatures in Red Dead Redemption 2. Tracking down this massive apex predator requires specific story progression, careful preparation, and the right combat strategy. This guide covers everything you need to know to locate, hunt, and defeat the beast safely.
Unlocking and Finding the Legendary Gator Location
Before you can find the Legendary Alligator, you must complete the main story mission "Country Pursuits" or progress into Chapter 6. Until this story requirement is met, the creature will not spawn in the wild. Once unlocked, head to the marshlands of Bayou Nwa, located south of Lagras and west of Lakay in the Lemoyne region.
When entering the territory, look out for an on-screen notification confirming you have entered a legendary animal area. If you receive a message about too much activity, leave the area, sleep at a nearby camp, and return later. Weather conditions like heavy fog can add atmosphere, but clear daylight makes spotting clues much easier.
Tracking and Preparing for the Hunt
Activate Eagle Eye upon reaching the search zone to highlight initial clues such as broken sticks, dung, or animal remains. Inspecting three unique investigation markers will establish a direct path toward the beast's location. Make sure to move cautiously, as the swamp is also populated by regular alligators and dangerous wildlife.
Because legendary pelts cannot be damaged by heavy firepower, bring your most devastating weaponry to the fight. Shotguns loaded with slug rounds or rifles equipped with high-velocity ammo work best against its massive health pool. Consuming Dead Eye tonics beforehand ensures you can land multiple critical headshots before it closes the distance.
Defeating the Beast and Claiming Rewards
Unlike standard alligators that retreat when approached, the Legendary Bull Gator will aggressively charge at Arthur upon detection. Keep a safe distance and activate Dead Eye immediately to unload consecutive shots into its head. If the beast gets too close, sprint away to reset your angle before firing again.
Once defeated, skin the animal to obtain the Legendary Alligator Skin and the Legendary Alligator Tooth. Taking the pelt to the Trapper allows you to craft exclusive gear like the Legendary Alligator Vest and Gambler's Hat. Meanwhile, taking the tooth to a Fence enables you to craft the Alligator Tooth Talisman, which permanently slows Dead Eye core drain.

Far Cry New Dawn Rescuers Go Under Mission...
The Rescuers Go Under treasure hunt in Far Cry New Dawn offers players a thrilling underground navigation puzzle located near Misery Falls. Completing this prepper stash rewards players with valuable perk magazines, crafting resources, and extra currency. Understanding the core steps makes navigating the cavern system and securing the hidden stash straightforward.
Starting the Mission and Climbing to the Cave
To begin the mission, travel to the base of the waterfall at Misery Falls and locate the disabled car near a green smoke flare. Inspect the yellow lockbox at the site to read the initial note and register the mission objectives. Make sure you have the Grapple perk unlocked, as climbing the cliff face above the river requires it.
Use the grappling points to ascend the steep rock ledges until you reach the top plateau. Keep your weapons ready upon arriving at the top, as wild bears often patrol the area surrounding the sinkhole entrance. Once the threat is clear, locate the water-filled sinkhole leading down into the cavern network.
Navigating the Submerged Cavern Routes
Plunge into the flooded sinkhole and dive underwater to traverse the initial cavern tunnels. Swim through the submerged log obstacles and surface inside the bioluminescent subterranean chamber. Follow the path forward until the treacherous cave floor gives out beneath your feet, dropping you into another lower water chamber.
After landing in the pool below, navigate past the submerged vehicles to find a dry landing ledge. The narrow corridors require crouching and careful swimming to reach the final obstacle area. Paying attention to environmental markers ensures you will not get disorientated while swimming through the dark spaces.
Solving the Car Puzzle and Claiming Rewards
In the final cavern section, you will encounter several trapped vehicles blocking access to the higher ledge. Walk up to the car perched on top and interact with the passenger side rear tire to release the brakes. The vehicle will roll down into position, creating a temporary bridge to jump across.
Leap onto the repositioned car to climb up to the prepper stash campsite. Search the sleeping bags and crates to gather three perk magazines, valuable crafting materials, and Far Cry Credits. Once you have collected the stash loot, follow the stream channel to safely exit out near the top of the waterfall.

How to Put PS5 Into Safe Mode: Complete...
Navigating technical glitches on the PlayStation 5 can be frustrating, especially when encountering black screens, system freezes, or failed software updates. Accessing Safe Mode serves as an essential diagnostic environment that allows users to start their console with basic functions to resolve system issues. Understanding how to properly launch and utilize this environment ensures that your gaming hardware remains functional and safe from corruption.
How to Access Safe Mode on Your Console
To begin the process, ensure your console is powered down completely by holding the power button until the indicator light stops blinking. Once powered off, press and hold the power button again until you hear two distinct beeps spaced about seven seconds apart. Connect your DualSense controller using a USB cable and press the PS button on the controller to bring up the menu screen.
Using a direct cable connection is necessary because Bluetooth connectivity is disabled while operating in this diagnostic environment. If your console fails to boot into this state, check that all cables are firmly seated and try again. Following these simple steps ensures you can reach system diagnostics safely whenever software errors prevent normal operation.
Understanding Available Diagnostic Options
Once inside the menu, you will encounter several options designed to address specific software errors and system instability. The options range from simply restarting the console to performing a complete system reset and reinstalling system software. Choosing the right option depends on the nature of the issue you are experiencing during regular use.
For minor issues like frozen games or audio glitches, clearing system cache or rebuilding the database can resolve performance bottlenecks without deleting save data. If you are experiencing persistent crashes, updating system software via a USB drive or internet connection often fixes corrupted system files. Selecting these options carefully prevents unnecessary data loss while resolving system conflicts.
When to Use Safe Mode Features
Safe Mode is particularly useful when experiencing repeated system crashes, display output issues, or failed firmware installations. It provides a direct path to restore default settings when customization options accidentally cause screen output problems. Taking advantage of these built-in recovery tools helps users fix common software hurdles at home before contacting customer support.
If severe system corruption occurs, restoring factory settings may be the only solution to return the console to a working state. Before taking drastic measures, attempting milder solutions like database rebuilds is always recommended. Learning when to utilize these options ensures effective console maintenance and prolongs hardware life.
Best Practices for Preventing System Failures
Maintaining console health involves keeping system software updated regularly and avoiding forced power shutdowns during operation. Ensuring proper ventilation around the console prevents overheating, which can frequently trigger system crashes and data corruption. Consistently backing up saved data to cloud storage protects your progress in case a system recovery becomes necessary.
Using diagnostic tools effectively empowers gamers to maintain their hardware and troubleshoot errors independently. By following structured steps to access system recovery tools, you can keep your console running smoothly and minimize gaming interruptions. Keeping these simple troubleshooting procedures in mind prepares you for any unexpected technical difficulties.

How to Put PS5 Into Safe Mode: Complete...
Navigating technical glitches on the PlayStation 5 can be frustrating, especially when encountering black screens, system freezes, or failed software updates. Accessing Safe Mode serves as an essential diagnostic environment that allows users to start their console with basic functions to resolve system issues. Understanding how to properly launch and utilize this environment ensures that your gaming hardware remains functional and safe from corruption.
How to Access Safe Mode on Your Console
To begin the process, ensure your console is powered down completely by holding the power button until the indicator light stops blinking. Once powered off, press and hold the power button again until you hear two distinct beeps spaced about seven seconds apart. Connect your DualSense controller using a USB cable and press the PS button on the controller to bring up the menu screen.
Using a direct cable connection is necessary because Bluetooth connectivity is disabled while operating in this diagnostic environment. If your console fails to boot into this state, check that all cables are firmly seated and try again. Following these simple steps ensures you can reach system diagnostics safely whenever software errors prevent normal operation.
Understanding Available Diagnostic Options
Once inside the menu, you will encounter several options designed to address specific software errors and system instability. The options range from simply restarting the console to performing a complete system reset and reinstalling system software. Choosing the right option depends on the nature of the issue you are experiencing during regular use.
For minor issues like frozen games or audio glitches, clearing system cache or rebuilding the database can resolve performance bottlenecks without deleting save data. If you are experiencing persistent crashes, updating system software via a USB drive or internet connection often fixes corrupted system files. Selecting these options carefully prevents unnecessary data loss while resolving system conflicts.
When to Use Safe Mode Features
Safe Mode is particularly useful when experiencing repeated system crashes, display output issues, or failed firmware installations. It provides a direct path to restore default settings when customization options accidentally cause screen output problems. Taking advantage of these built-in recovery tools helps users fix common software hurdles at home before contacting customer support.
If severe system corruption occurs, restoring factory settings may be the only solution to return the console to a working state. Before taking drastic measures, attempting milder solutions like database rebuilds is always recommended. Learning when to utilize these options ensures effective console maintenance and prolongs hardware life.
Best Practices for Preventing System Failures
Maintaining console health involves keeping system software updated regularly and avoiding forced power shutdowns during operation. Ensuring proper ventilation around the console prevents overheating, which can frequently trigger system crashes and data corruption. Consistently backing up saved data to cloud storage protects your progress in case a system recovery becomes necessary.
Using diagnostic tools effectively empowers gamers to maintain their hardware and troubleshoot errors independently. By following structured steps to access system recovery tools, you can keep your console running smoothly and minimize gaming interruptions. Keeping these simple troubleshooting procedures in mind prepares you for any unexpected technical difficulties.

SF6 World Tour Best Gear: Top Equipment and...
Equipping the ideal gear in Street Fighter 6 World Tour mode is essential for increasing your custom avatar's combat stats and surviving tough late-game encounters. While cosmetic appearance loadouts allow players to customize their visual style freely, underlying equipment attributes dictate defense, attack power, and special passive perks. Understanding how top-tier gear pieces synergize helps players construct optimal builds for endgame tournaments and high-level Master fights.
Essential High-Stat Clothing for World Tour Avatars
Top-performing body gear offers substantial defense increases alongside powerful passive effects. For example, the Fighter's Hoodie and Fighter's Sweatpants provide exceptional base defense while granting damage boosts when your health remains high. Combining these items with sturdy headgear like the Full Face Helmet ensures maximum resilience against aggressive opponents in end-game regions.
Footwear plays a crucial role in balancing offensive strikes and mobility stats. Equipping Basketball Shoes grants a noticeable boost to kick strength along with necessary defense points. Upgrading these core armor pieces through enhancement merchants raises your overall power rating significantly.
Powerful Accessories and Stat Passive Traits
Accessories add targeted offensive capabilities and unique utility traits that turn the tide of difficult fights. Items like the Initiate's Chain offer balanced increases across punch, kick, throw, and unique attack power. Players seeking defensive sustainability often opt for the Cute Choker or health-regenerating accessories to survive prolonged combat rounds.
Stacking specific accessory perks creates tailored combat playstyles suited for different Masters. Utilizing damage-boosting traits allows strike-heavy builds to finish battles much quicker. Experimenting with three unlocked accessory slots maximizes your avatar's potential in open-world encounters.
Optimizing Gear Upgrades and Appearance Options
Upgrading equipped gear to maximum level dramatically enhances baseline stats across all equipped categories. Investing Zenny into gear enhancement ensures that early-found armor remains competitive during late-game challenges. Players should routinely visit merchants in Nayshall and Metro City to acquire rare upgrade materials and top gear sets.
Street Fighter 6 features a separate appearance loadout system that decouples stats from visual aesthetics. Unlocking this feature in the World Tour skill tree allows you to maintain optimal combat stats while wearing any unlocked outfit. This system guarantees that players never have to sacrifice personal fashion to maintain elite combat effectiveness in Avatar Battles.

Mike Tyson's Punch Out Characters in Order: Complete...
Mike Tyson's Punch-Out!! on the NES remains one of the most celebrated arcade-style boxing games in video game history. Players take control of young underdog Little Mac as he fights his way through three distinct circuits to reach the legendary Dream Fight. Understanding the exact order of opponents helps gamers anticipate changing difficulty spikes and master every boxer's unique attack pattern.
The Minor Circuit Opponents
Your journey begins in the Minor Circuit, designed to teach players basic dodging, blocking, and counter-punching mechanics. The first opponent Little Mac faces is Glass Joe from France, who offers a gentle introduction with predictable movements. Next up is Germany's Von Kaiser, a quick military instructor who requires careful timing to defeat.
The Minor Circuit continues with Piston Honda from Japan, who tests your ability to block rapid-fire jabs. The final challenge of this initial bracket is the flamboyant Don Flamenco from Spain, who introduces taunting mechanics. Defeating Don Flamenco earns Little Mac his first championship belt and unlocks entry into the next tier.
The Major Circuit Contenders
Stepping into the Major Circuit introduces far more aggressive fighters with tricky special maneuvers. The bracket kicks off with King Hippo, an iconic heavyweight who requires players to target his open mouth before striking his belly. He is immediately followed by Great Tiger, a mystic fighter from India who teleports across the ring to confuse opponents.
Next, Little Mac must overcome the fearsome Bald Bull, whose notorious Bull Charge can knock you out instantly if missed. You then face a rematch against Piston Honda, who returns with faster attacks and higher damage output. Securing a victory against him advances you directly into the game's toughest competitive bracket.
The World Circuit Heavyweights
The World Circuit features the most relentless boxers in the game, starting with the soda-obsessed Russian heavyweight Soda Popinski. Players must then survive a brutal second fight against Bald Bull, who hits significantly harder than in their first encounter. Immediately after, Don Flamenco returns for a rematch with a completely reworked counter-attack strategy.
The upper ranks feature Mr. Sandman, a intimidating power hitter from Philadelphia who relentlessly pressures players. Following him is Super Macho Man, a Hollywood celebrity who utilizes devastating spin punches to clear the ring. Beating these fighters allows players to review strategies before taking on the final boss encounter.
The Dream Fight Final Boss
At the pinnacle of the career mode lies the ultimate challenge against the game's namesake, Iron Mike Tyson. During the first minute and a half of the bout, Tyson throws lightning-fast dynamite punches that knock Little Mac out in a single hit. Mastering dodge timings against this final bout remains one of retro gaming's greatest achievements.

PS5 Digital Edition Used Price And What Buyers...
Navigating the pre-owned console market can be a smart move for gamers looking to enter current-generation gaming without paying full retail prices. The PS5 Digital Edition offers the exact same internal processing power and high-speed SSD performance as the standard model while excluding the physical disc drive. Understanding typical secondary market pricing and potential hardware risks will ensure you make an informed investment.
Current Used Pricing Expectations for the PS5 Digital Edition
The secondary market value for a used PS5 Digital Edition generally fluctuates based on condition, included accessories, and whether it is an original release or a revised Slim variant. Typically, buyers can expect to pay anywhere from $230 to $320 depending on the seller platform and hardware age. Certified refurbished units from official retailers often cost slightly more, but they come with added peace of mind through return guarantees.
When comparing prices, evaluate whether the offer includes additional controllers or pre-installed storage upgrades. A standalone console with heavy cosmetic wear usually stays near the bottom of the price range, whereas a pristine unit with all original packaging commands a premium. Finding reliable listings from trusted platforms like contoh.com can help buyers gauge fair market rates before committing to a purchase.
Hardware and Accessories to Inspect Before Buying
Because the Digital Edition lacks a physical optical drive, inspecting the internal storage and port conditions is critical. You should request proof that the console connects properly to local networks and that the rear USB and HDMI ports show no signs of physical damage or loose solder connections. Verifying that the internal SSD functions smoothly without overheating warnings is equally essential during an in-person test.
Pay close attention to the included DualSense controller, as replacement gamepads add significant cost to your overall purchase. Check the analog sticks thoroughly for any signs of stick drift or unresponsive haptic feedback motors. Additionally, make sure the console includes its proper power cable, HDMI cord, and functional base stand.
Account Status and Network Security Considerations
One critical risk when purchasing a pre-owned PlayStation console is the possibility of hardware-level bans imposed by Sony. If a previous owner violated PlayStation Network terms or initiated fraudulent chargebacks, the system's unique serial number may be permanently blocked from online play. Always ask the seller to demonstrate logging into a live PSN account and launching an online game before completing the transaction.
Never purchase a system that arrives pre-loaded with digital games tied to a stranger's user account. Sellers cannot legally transfer ownership of digital games, meaning the original owner can reclaim access or wipe the console remotely at any time. Insist that the seller performs a full factory reset on the device so you can set up your own personal profile from scratch.
Weighing Long-Term Costs of a Digital-Only Setup
Choosing a disc-free console means relying entirely on the PlayStation Store for all future software purchases. While digital sales happen frequently, you lose the ability to buy cheap physical trade-ins, borrow discs from friends, or rent physical copies. Prospective buyers should weigh these ongoing digital software costs against the upfront savings of purchasing a used Digital Edition system.
Super Mario RPG Shiny Stone Location And How...
Navigating the colorful world of Super Mario RPG reveals plenty of unique secrets, rare items, and optional boss challenges hidden across various regions. Among these curious treasures, the Shiny Stone stands out as an essential quest item required to unlock one of the most legendary encounters in the game. Understanding exactly how to claim this object ensures your party can access the mysterious extra content hidden within Monstro Town.
Visiting Moleville to Start the Trade
Securing the stone requires visiting the bustling mining settlement of Moleville after completing the main story objectives in that area. Once you have cleared the mines, head into the local item shop where a unique trading option becomes available. Inside, you will encounter a small mole character willing to trade a precious item in exchange for a specific sweet treat.
To fulfill her request, you must first obtain a Fireworks item from the male mole resident standing nearby inside the same shop. Buying these fireworks will cost you 500 Coins, making it a relatively small investment for the ultimate reward. After making the initial purchase, step outside and trade the fireworks to a little mole girl nearby to receive a Carbo Cookie.
Exchanging the Cookie for the Stone
With the Carbo Cookie safely inside your inventory, return to the shopkeeper's house or find the specific mole child waiting to make a trade. Handing over this rare confection satisfies her sweet tooth completely, prompting her to give you the desired glowing mineral in return. This trade completes your collection phase, adding the essential quest item directly into your key inventory slots.
It is important to remember that this item serves no combat purpose on its own and cannot be equipped by your party members. Instead, it functions purely as a key that breaks down a specific magical seal hidden later in your journey. Players often overlook this sequence because it requires backtracking through local vendor inventories, but completing the trade is well worth your time.
Finding the Sealed Door in Monstro Town
Once the item is secure, continue your campaign progression until you successfully arrive at the subterranean settlement of Monstro Town. While exploring the rocky pathways, you will notice a unique stone house with a locked door emitting a dark aura. Approaching this ominous entryway prompts a dialogue message indicating that the door is tightly sealed by a powerful force.
Interacting with the portal while carrying the stone triggers a special event where the artifact reacts to the dark energy. The barrier absorbs the brilliant light, shattering the lock permanently and granting your team access to the room beyond. Preparing your characters before crossing this threshold is highly recommended, as an incredibly formidable opponent awaits inside.
Preparing for the Secret Boss Encounter
Stepping inside the unsealed room brings Mario and his companions face-to-face with Culex, a powerful entity originating from another dimension. This optional multi-part battle serves as one of the ultimate tests of tactical strategy and character optimization in the entire game. Players must balance high-damage offensive options with robust defensive buffs to survive the devastating elemental attacks.
Conquering this extra challenge rewards dedicated adventurers with a rare accessory that drastically boosts individual combat attributes. Taking the time to hunt down the initial trading elements ensures you do not miss out on this fantastic endgame milestone. Ensuring your squad possesses optimal gear and maxed levels will greatly improve your chances of achieving a complete victory.

Sea Of Stars Stillpond Island Location And Exploration...
Exploring the expansive world of Sea of Stars often rewards players with hidden zones that offer unique challenges and valuable treasures. Among these specialized locations, Stillpond Island stands out as a peaceful yet intriguing destination that requires specific progression to unlock. Knowing how to reach this isolated piece of land and solve its environmental puzzles can significantly enhance your late-game journey.
Finding Stillpond Island on the Map
Stillpond Island is situated in the Home World, positioned toward the southwestern portion of the regional map layout. Accessing this specific island is completely restricted until players unlock the ability to fly later in the main narrative campaign. Once you gain total control of the skies, you can easily spot this isolated, green landmark surrounded by open ocean water.
When you approach the location from above, look for a small landing zone nestled directly on the island's rocky coast. Touching down safely allows your party to transition into an interactive area filled with unique flora and a large central body of water. This zone serves as a primary hub for players looking to master all available recreational mechanics in the game.
The Great Fishing Challenge
The primary attraction on Stillpond Island is its pristine, expansive fishing lake, which hosts some of the rarest aquatic creatures in the entire adventure. Anglers looking to complete their global collection checklist will find this spot absolutely essential for gathering missing marine entries. Managing your line across these calm waters requires patience and precise directional input to avoid sudden breaks.
Before diving into the deep waters, ensure your characters are well-equipped to handle aggressive fish varieties that fight hard against the reel. Successfully clearing out the lake not only provides high-tier cooking ingredients but also unlocks pathing progression within the immediate environment. Gathering every specimen ensures that your party remains fully prepared for subsequent completionist milestones.
Uncovering Hidden Ruins and Treasures
Beyond its calm shores, Stillpond Island contains subtle environmental puzzles that point toward ancient structural remnants hidden beneath the surface. Investigating the surrounding stone formations reveals interactive mechanisms that alter water levels and open new pathways. Utilizing your party's unique traversal tools is vital for bypassing these clever physical barriers efficiently.
Dedicated explorers will eventually discover a hidden cavern entrance that leads to a valuable treasure chest packed with rare equipment pieces. These items offer substantial stat boosts that can give your chosen combat roster a distinct advantage during endgame boss encounters. Taking the time to thoroughly scan every corner ensures you leave no mystical artifacts behind on the island.

Subnautica Below Zero Map With Drop Pod Locations...
Navigating the frozen depths of Planet 4546B in Subnautica Below Zero requires a deep understanding of geography and resource management. For survivalists looking to establish their initial bases or recover vital technology, understanding the distribution of emergency supply drop pods across the biome maps is essential. This guide breaks down the coordinates and surrounding hazards for the most critical supply locations to ensure your arctic journey remains on track.
The Role of Drop Pods in Arctic Survival
Drop pods serve as foundational landmarks that provide players with essential tools, rations, and crafting blueprints during the early phases of the game. These structures are scattered across distinct underwater trenches and icy shores, meaning players must prepare for fluctuating temperatures and local predators. Mapping these locations out early helps you create efficient travel routes and minimizes the risk of running out of oxygen in deep waters.
Each pod contains unique cargo tailored to help you overcome regional environmental obstacles. Some are buried near dangerous thermal vents, while others sit quietly in shallow coral zones meant for quick retrieval. Veteran explorers highly recommend marking these spots with deployable beacons to maintain your bearings during heavy blizzards or dark night cycles.
Key Drop Pod Locations in the Shallow Biomes
The initial emergency pod serves as your primary hub, located safely within the relatively peaceful Sparse Arctic zone. This area contains a steady supply of basic materials like ribbon plants and copper ore to get your fabrication started. It offers a reliable sanctuary where you can recharge your equipment before venturing into deeper, more hostile territories.
Further out, players can discover secondary supply caches hidden near the borders of the Twisty Bridges. These pods often contain structural reinforcements or advanced wiring kits necessary for upgrading your diving gear. Reaching them requires cautious navigation through the winding ribbon structures to avoid aggressive brute sharks lurking in the shadows.
Navigating the Deep Sea and Thermal Drop Pods
As you progress into the deeper segments of the map, drop pods become significantly harder to access due to extreme crushing pressure. The locations situated near the Purple Vents or the Thermal Spires require a upgraded SeaTruck with proper depth modules to survive the descent. These areas are rich in crystalline sulfur and diamond, making them high-priority targets despite the increased danger.
Surrounding these geothermal anomalies, players must manage their vessel's heat signatures while monitoring nearby leviathan patrol routes. The rewards in these deeper caches include vehicle upgrade fragments and high-capacity oxygen tank schematics that fundamentally alter your exploration limits. Taking the time to study these deep paths guarantees you will not get trapped by the shifting underwater topography.
Strategic Tips for Mapping Your Journey
To maximize your efficiency, it is best to combine drop pod retrieval missions with your search for major Alterra research facilities. Grouping your expeditions by geographic quadrants reduces battery drain on your sea vehicles and keeps your inventory organized. Always carry extra food, water, and a laser cutter since some pods feature sealed bulkheads that require mechanical breaching.
Ultimately, treats these supply points as temporary stepping stones toward establishing permanent, self-sustaining habitats across the sector. Utilizing the map layouts effectively ensures that the harsh environment of Subnautica Below Zero becomes a manageable landscape rather than a fatal trap. With patience and the right coordinates, you can conquer the frost and uncover the planet's deepest corporate secrets.

helldivers 2 crashing on startup Causes and Fixes...
Helldivers 2 delivers an exhilarating cooperative warfare experience, but encountering sudden technical disruptions right at launch can quickly ruin your gaming session. Many players report frustrating moments where the game abruptly closes or freezes before they can even reach the main ship dashboard. Understanding the underlying reasons behind these initial loading failures is the first step toward restoring system stability and deploying safely into the galactic conflict.
Identifying Common Software Conflicts and Game File Corruption
One of the most frequent triggers for an immediate launch crash is broken or missing data within your local installation directories. Sudden power drops or interrupted updates can corrupt essential system files, preventing the engine from initializing properly. Validating your installation integrity through your digital storefront launcher can quickly replace faulty elements without requiring a full reinstallation.
Additionally, specialized background programs and third-party overlays frequently compete for critical system resources during bootup sequences. Security software or performance trackers can inadvertently flag the game's anti-cheat components as suspicious behavior, resulting in an automated shutdown. Temporarily disabling non-essential background applications before launching the game often resolves these deep structural blockages.
Managing Graphics Processing Unit Drivers and Power Settings
Maintaining optimal graphics hardware performance requires a solid understanding of thermal baselines and operational limits during intensive computing tasks. Outdated graphics processing unit drivers are notorious for failing to handle modern software deployment protocols, leading to immediate desktop crashes. Visiting the official manufacturer website to secure the latest software updates ensures your hardware operates efficiently with modern game configurations.
System power configurations also play a surprisingly critical role in hardware stability during heavy boot loads. If your operating system defaults to a restricted energy saving mode, the system might struggle to feed key components during sudden bursts of demand. Adjusting your power options to a high-performance profile guarantees that your processor receives stable line voltage when loading heavy visual assets.
Resolving Local Administration Restrictions and Registry Bugs
Strict operating system permissions can occasionally prevent game packages from modifying temporal files or reading essential storage sections. Running your digital distribution client as an administrator bypasses these localized security boundaries, allowing the game executable full access to necessary game paths. Furthermore, setting file permissions to allow full access can permanently resolve recurring read-only conflicts within your primary installation folder.
In rare instances, local cache data or old shader configurations can become completely mismatched following major live-service updates. Manually purging the application data folders forces the game engine to rebuild its internal configurations freshly upon the next boot. Taking a brief period to clean your temporary local directories effectively prevents complex conflict loops and safeguards your long-term progression data.

Code Vein Howling Pit Map Guide With Important...
The Howling Pit in Code Vein is a dark, mist-filled labyrinth that often challenges players with its poor visibility and deep water hazards. Navigating this area requires carefully activating various lever mechanisms to alter the terrain and reveal safer pathways. Understanding the specific locations of key milestones ensures a smoother journey through one of the game's trickiest early zones.
Activating the Critical Mistles
Finding and resting at Mistles throughout the Howling Pit serves as your primary lifeline for saving progress and replenishing supplies. The entrance Mistle provides an initial anchor point before you descend into the dense, foggy marshlands. As you push deeper, locating the secondary checkpoints requires careful pathfinding through areas filled with aggressive enemies and hidden drop-offs.
The final Mistle in this region is positioned right before the major boss arena, offering a crucial staging ground for final equipment adjustments. Clearing out nearby threats allows you to easily map your surroundings and establish a reliable route back if things go south. Prioritizing these checkpoints will significantly minimize backtracking through the dangerous miasma.
Locating Essential Vestiges
The Howling Pit contains several critical memory remnants that expand the game world's lore and unlock powerful character gifts. Searching for the Atlas Vestige Parts requires checking the outer edges of the flooded platforms where valuable items are frequently tucked away. These glowing shards are often guarded by larger, elite variants of the standard subterranean monsters.
Uncovering every single vestige piece demands thorough exploration of the narrow side paths that branch off from the main routes. Missing even one piece can prevent you from fully repairing the associated Blood Code at home base later. Keeping your flashlight active and watching for subtle environmental cues will lead you straight to these hidden treasures.
Navigating the Lever Mechanisms
To successfully chart the entire area, players must interact with multiple glowing beacons that control the surrounding water levels. Pulling these levers drains specific pathways, allowing you to walk freely without the heavy movement penalties caused by deep mud. Each activated mechanism also raises a bright light column that helps you maintain your orientation in the dark.
Some mechanisms are strategically placed behind hidden walls or require dropping down from elevated ridges onto small platforms. Activating all of them eventually opens a direct shortcut connecting the lower levels back to the region's main entrance. This streamlined route makes farming for upgrade materials much more efficient during subsequent visits.
Conquering the Fearsome Area Boss
At the deepest point of the marsh lies the entrance to a dramatic showdown against the Invading Executioner. This agile opponent utilizes devastating water-based area attacks and rapid slide movements that catch unprepared players off guard. Preparing your build with slow-resistance gear and mobility enhancements is highly recommended before stepping through the mist.
Defeating this agile guardian rewards you with a fresh Blood Code and opens the way forward into the next narrative chapter. Utilizing the nearby terrain to block incoming lunges provides reliable windows for landing powerful counterattacks. Once the threat is minimized, you can safely claim the remaining resources scattered along the edges of the boss chamber.

Should You Let the Emperor Evolve You in...
At the dramatic conclusion of Act 2 in Baldur's Gate 3, players face a pivotal choice when the mysterious Emperor offers an Astral-Touched Tadpole to induce partial ceremorphosis. This decision presents a massive turning point that balances terrifying cosmetic changes against god-like cosmic power. Deciding whether to accept this gift requires evaluating how much you value combat supremacy over your character's physical humanity.
The Massive Combat Advantages of Evolving
Accepting the Emperor's evolutionary catalyst unlocks the outer ring of the Illithid power tree, granting access to some of the strongest abilities in the game. Characters gain incredible mechanical utility, including the passive ability to fly automatically without consuming spell slots or movement actions. Elite tier actions like Black Hole allow you to pull and slow entire groups of enemies, making late-game encounters and dense dungeon battles significantly easier.
Furthermore, powerful passive abilities like Cull the Weak instantly execute low-health targets and cause them to explode for widespread area damage. These psionic upgrades turn your party into absolute powerhouses capable of controlling the battlefield with ease. If you are struggling with difficult boss fights on higher difficulties, embracing this transformation provides an unmatched tactical edge.
The Aesthetic Cost and Companion Reactions
While the gameplay benefits are undeniably massive, the physical consequences of partial ceremorphosis are immediate and permanent. Your character's face will become heavily veined with dark, rotting lines and their eyes will shift to a piercing, sunken black appearance. If you have spent hours perfecting your character's look, this dramatic visual corruption can be a jarring change to your immersion.
Additionally, your companions will react with mixed feelings, ranging from open disgust to deep disappointment when they see your new form. While you can eventually try to convince them to use the tadpole as well, forcing them requires passing difficult dialogue checks. Fortunately, your romantic relationships will not be permanently broken, but the initial social backlash within the camp can feel quite severe.
Story Consequences and Narrative Outcomes
Many players hesitate to evolve because they fear it will lock them into a tragic ending or completely strip away their soul. Surprisingly, Larian Studios designed this mechanic with complete narrative flexibility, meaning that becoming a partial-illithid does not force you into a bad ending. You are still completely free to choose your final destiny, whether that means saving the Forgotten Realms or seizing absolute power for yourself.
It is important to note that rejecting the Emperor initially requires a high Wisdom saving throw if you have already consumed standard parasites throughout your journey. For those interested in optimizing their combat loadouts further, exploring detailed community setups like Illithid Abilities can help you choose the best paths. Ultimately, the choice boils down to whether you can tolerate a sinister appearance in exchange for unmatched combat efficiency.
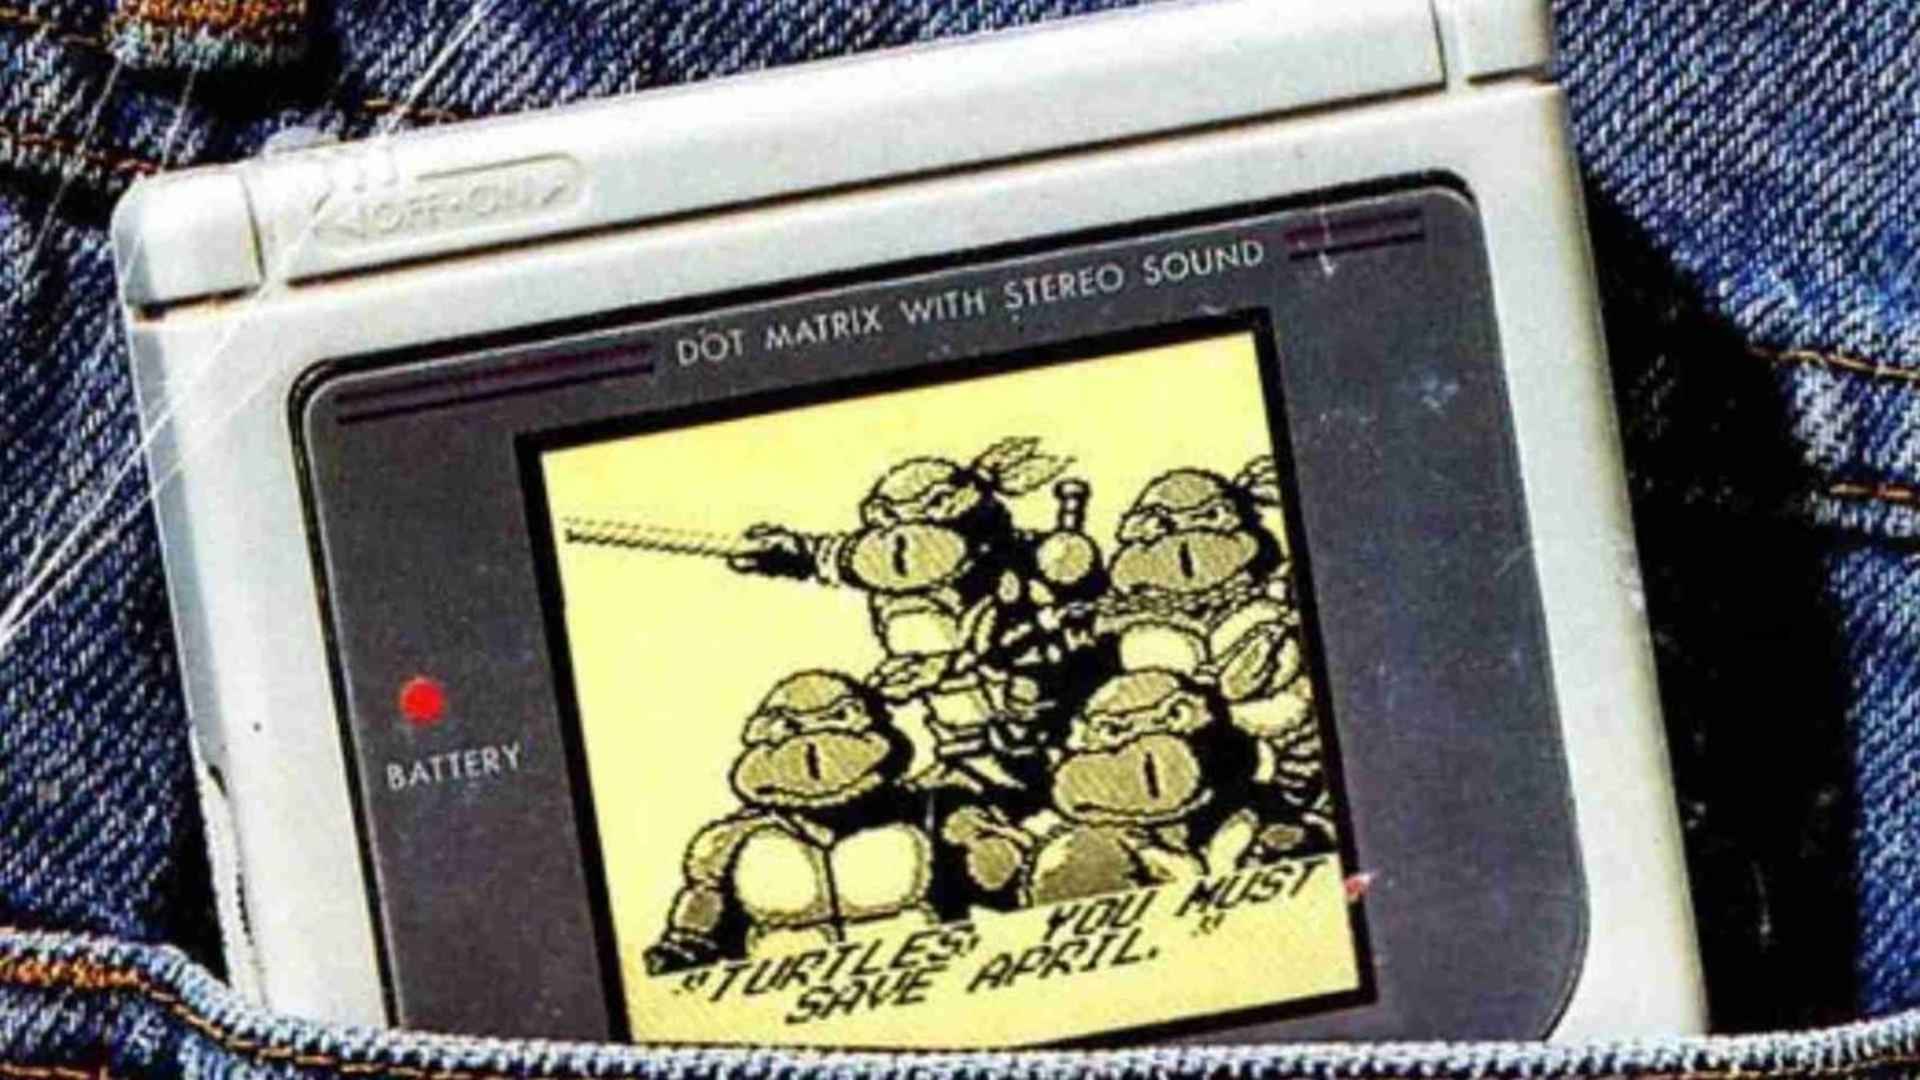
Blasphemous 2 Wax Seed Locations And Collection Guide
The punishing world of Cvstodia is filled with unique mysteries and side activities that expand the lore of Blasphemous 2. Among the most emotionally resonant tasks is helping an NPC named Cesareo, a mourning father located in the Severed Tower who requires unique items to appease his grief. To complete this questline and unlock valuable rewards, players must track down six hidden items known as Wax Seeds scattered across various dark zones. Understanding how to navigate these treacherous landscapes ensures your completion journey remains efficient and highly rewarding.
Initiating the Quest with Cesareo
Before you begin gathering these components, you need to visit the Severed Tower region to locate the distressed father. Cesareo can be found sitting in a secluded room holding his child, patiently waiting for someone to bring him comfort. Interacting with him triggers a long-term request requiring you to find and deliver all six seeds to complete his garden. This specific mission requires a balance of environmental exploration and specific traversal abilities to reach the highest points of the map.
Locating the World Explorable Seeds
Four of the required seeds are hidden deep within the game world, waiting to be discovered by observant players. The first item can be tracked down in the Labyrinth of Tides, tucked away behind a secret wall that requires quick positioning. Another seed is positioned in the Choir of Thorns, demanding a clever jump sequence using your unlocked traversal upgrades to bypass thorny hazards. Tracking these down rewards thorough exploration of the dense interconnected map segments.
The remaining exploration targets require checking hidden alcoves in both the City of the Blessed Name and the Two Moons region. Navigating these zones smoothly means you must look for interactive platforms and breakable walls that conceal small treasures. For players looking to keep track of their global progress and achievements online, utilizing a Steam account provides an excellent digital framework for tracking milestone completion. Gathering these items progressively builds your inventory and moves you closer to completing the central task.
Purchasing from the Moving Merchant
Not all seeds can be collected through standard world exploration as some require a significant financial investment. A specific Wax Seed must be purchased from the elusive Moving Merchant, who changes locations as you progress through the main campaign. This item typically costs twelve thousand Tears of Atonement, making structural currency management essential during the early phases of your playthrough. Saving up your rewards ensures you can instantly secure this rare asset when visiting his shop.
Completing the Garden and Securing Rewards
Once you successfully return all six Wax Seeds to Cesareo, you can plant them in the designated spots around his room to conclude his narrative arc. Witnessing the final transformation of the room provides deep thematic closure to this tragic side story. Your dedication to the quest is rewarded with a powerful item that enhances your combat abilities against the toughest bosses in the game. Balancing the use of exploration guides with your personal combat style offers the ultimate way to conquer this memorable Metroidvania journey.
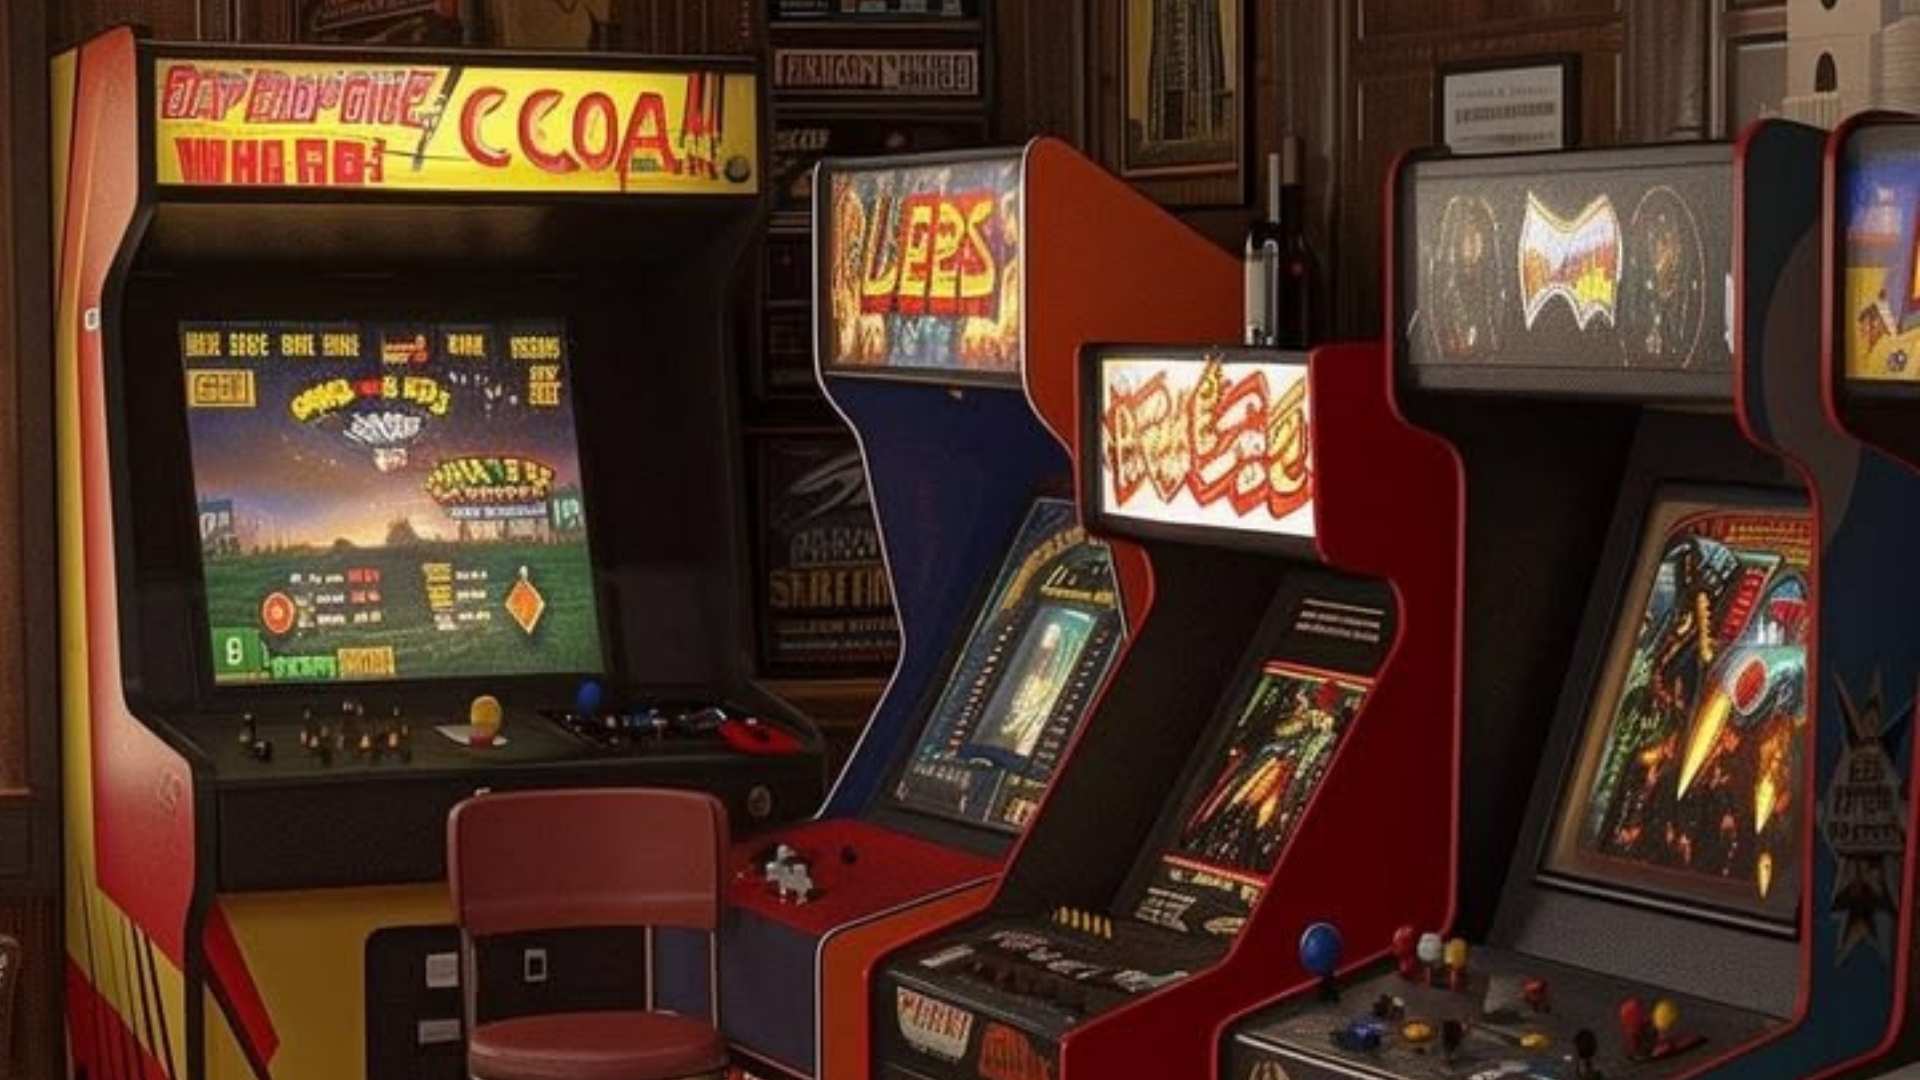
How to Get S in Ready or Not...
Achieving the prestigious S Rank in Ready or Not stands as the ultimate test of tactical patience and structural execution for virtual SWAT commanders. Unlike standard tactical shooters that reward swift and lethal aggression, Void Interactive's realistic simulation demands an absolute commitment to non-lethal rules of engagement. Mastering this score requires players to completely restructure their arsenal, coordinate AI teammates flawlessly, and meticulously secure every piece of evidence across chaotic operational zones.
The Golden Rule of Less Lethal Force
The core mechanic separating an S Rank from an A Rank is the absolute preservation of human life during a raid. Every single suspect on the map must be successfully apprehended alive, which automatically disqualifies the use of standard lethal firearms. To accomplish this demanding task, your entire squad should be outfitted with specialized non-lethal primary weapons like beanbag shotguns or pepperball launchers.
While the beanbag shotgun acts as an incredible tool for quickly staggering aggressive targets, players must avoid shooting suspects directly in the head to prevent accidental fatalities. Additionally, packing heavy tactical equipment like gas grenades and flashbangs ensures you can continuously overwhelm room interiors before your team ever crosses the threshold. Maintaining a strict zero-lethal policy ensures that your baseline score remains intact throughout the grueling deployment.
Securing Objectives and Evidence
Arresting hostile combatants is only half the battle when aiming for a flawless operational evaluation. A perfect score requires the absolute completion of all secondary objectives, which includes reporting every downed individual and collecting all discarded weaponry. Neglecting to bag a single dropped pistol or failing to restrain a compliant civilian will instantly penalize your score and drop your rating.
To ensure total compliance across the map, operators must learn how to use their tactical mirrors to thoroughly scout rooms for hidden threats before opening doors. It is highly recommended to instruct your tactical AI elements to deploy the restraint procedures immediately after a room is cleared. This systematic approach guarantees that no evidence is accidentally left behind in the dark corners of the compound.
Squad Management and Tactical Patience
Attempting to earn an S Rank as a lone wolf is an incredibly difficult endeavor that usually ends in disaster due to the aggressive enemy AI. Managing your AI companions effectively allows you to cover multiple entry vectors simultaneously and execute synchronized room breaches. Utilizing the queue command system lets your squad deploy tactical shields and continuous tear gas, forcing hostile elements to surrender without firing a shot.
Patience remains your most valuable asset when dealing with unpredictable suspects who refuse to drop their weapons during an encounter. Instead of panicking and resorting to lethal sidearms, operators should utilize tasers or immediate melee strikes to force compliance from stubborn targets. By moving methodically through each sector and prioritizing non-lethal tools, your squad can consistently secure the highest possible honors in any mission scenario.

Circle of the Moon Map Full Exploration Guide...
Navigating the labyrinthine corridors of Dracula's dark fortress remains one of the most rewarding challenges in classic handheld gaming history. Fully charting this intricate fortress requires patience, spatial awareness, and a strategic understanding of how newly acquired movement abilities unlock previously unreachable zones. This comprehensive guide details the essential pathways, secret rooms, and critical landmarks needed to achieve total completion of the map.
Mastering Progression Through Core Traversal Zones
Your journey begins in the grim depths of the Catacombs, a perilous starting area filled with aggressive undead creatures. Defeating the initial bosses here grants you the essential relics required to perform high jumps and dash maneuvers across large gaps. These early milestones are critical because they dictate your route through the rest of the dark castle architecture.
As you ascend into the Audience Chamber, the layout becomes significantly more complex with branching vertical shafts. You must meticulously test every wall since many paths remain blocked until you secure late-game exploration tools. Remembering these blocked corridors will save you massive amounts of time when backtracking through the estate later on.
Locating Hidden Rooms and Rare Upgrades
Achieving a perfect completion score depends heavily on discovering the small, breakable walls scattered across seemingly empty dead ends. Many of these obscured chambers contain vital permanent upgrades that boost your health, magic points, and heart capacity. Missing these items makes surviving the brutal encounters in the upper towers significantly more difficult.
Valuable defensive gear and rare attribute boosters are frequently tucked away in the isolated corners of the Chapel and the Underground Gallery. Intrepid explorers should always pay close attention to structural anomalies or sudden dead ends in the layout. Dedicating time to thoroughly sweep these suspicious areas ensures your character grows strong enough to face the final threats.
Conquering High Stakes Tactical Boss Arenas
Every major section of the fortress is guarded by a powerful entity that holds a vital piece of the overall progression puzzle. The battle chambers are strategically positioned to act as gateways, preventing players from moving deeper into the inner sanctorum without a fight. Learning the unique attack patterns within these distinct arenas is essential for ensuring your survival.
Defeating these guardians rewards you with the specific action relics needed to change how you interact with the environment. For instance, clearing the Observation Tower opens up access to massive vertical corridors that were previously impossible to climb. Successfully navigating these high-stakes encounters gradually bridges the gap between the isolated lower ruins and the final peak.
Navigating the Final Approach to the Inner Sanctorum
The ultimate challenge awaits in the Ceremonial Room, which serves as the dramatic climax of your castle exploration journey. Reaching this heavily fortified destination requires you to have fully utilized every relic earned throughout your long trek. The surrounding corridors feature the most dangerous enemy configurations designed to test your combat reflexes.
Before crossing the final threshold, it is highly recommended to perform a comprehensive sweep of any remaining gray areas on your map screen. Ensuring you have collected all hidden components provides a distinct tactical advantage during the ultimate confrontation. Achieving total mastery over the topography marks the true conclusion of this unforgettable gothic adventure.

How Do You Make Sushi In Dreamlight Valley
Cooking in Disney Dreamlight Valley is one of the most engaging mechanics for players looking to build friendships, restore energy, and complete crucial character quests. Among the vast array of culinary options available, learning how to prepare classic seafood dishes is a great milestone for any home chef. This guide breaks down the simple requirements needed to prepare a perfect roll at your cooking station.
Gathering the Required Ingredients
To successfully prepare standard Sushi, you only need to acquire two specific ingredients from across the valley map. The base of this particular recipe requires one portion of Rice and any type of Fish caught from the local water sources. Combining these two elements ensures you create the correct item without wasting extra resources on more complex culinary variations.
Finding these materials requires visiting specific biomes that open up as you progress through the main story chapters. Rice seeds or fully grown crops can be purchased directly from Goofy's Stall located in the Glade of Trust area. Meanwhile, any standard fish pulled from a pond or ocean ripple using your royal fishing rod will satisfy the seafood requirement perfectly.
The Cooking Process at the Station
Once you have gathered your materials, head over to any available cooking stove inside your house or Remy's restaurant kitchen. Interact with the station, select one piece of rice and one fish, and toss them together into the bubbling pot. You will also need one piece of Coal to ignite the stove fire and complete the blending process.
It is important to avoid adding any extra items like seaweed or vegetables during this specific preparation step. Mixing unnecessary ingredients might accidentally trigger a different recipe entirely, such as Maki rolls or Fugu sushi, which require their own distinct combinations. Keeping the formula minimal guarantees you receive the exact two-star meal intended for your valley companions.
Benefits and Practical Uses for Sushi
Preparing this dish offers excellent utility for players navigating the daily activities and friendships scattered throughout the magical neighborhood. Consuming a freshly prepared roll provides a substantial boost to your character's stamina meter, allowing you to run faster and perform continuous gathering tasks. It also serves as an excellent gift choice when featured as a daily favorite item for your Disney residents.
Additionally, keeping a stock of simple meals handy will ensure your inventory is well-prepared for sudden request quests or Star Path milestones. Many iconic characters, including Mother Gothel, frequently ask for specific seafood items to advance their unique narrative bonds. Learning these straightforward kitchen formulas saves considerable time while helping you maintain a highly efficient resource management strategy.

The Long Dark Pleasant Valley Map And Important...
Navigating the frozen wilderness of The Long Dark requires a deep understanding of Great Bear Island's distinct regions. Among these locales, Pleasant Valley stands out as a massive and deceptively hazardous territory characterized by its vast, open fields and volatile weather patterns. Survivors traveling through this expansive valley must memorize the layout and key landmarks to avoid freezing to death during sudden, violent blizzards.
The Unique Challenges of the Pleasant Valley Terrain
Unlike the tightly packed corridors of Mystery Lake, this region features sweeping rural plains that offer little immediate shelter from the elements. The wide-open spaces make it exceptionally easy to lose your orientation when heavy fog or sudden snowstorms roll across the valley floor. Additionally, the region is statistically prone to experiencing more frequent and long-lasting blizzards than many other sectors of the game world.
The lack of dense physical boundaries means that wind chill factors can rapidly degrade your clothing condition if you are caught unprepared. However, these massive open fields provide an advantage by allowing you to spot aggressive wildlife, such as wolves and bears, from a comfortable distance. Successful long-term survival in this specific map relies heavily on moving methodically between established structures before the afternoon weather takes a turn for the worse.
Crucial Shelters and Central Locations
The definitive focal point of the entire map is the Pleasant Valley Homestead, an expansive residential farmhouse situated near the center of the plains. This structure features a massive indoor layout with an integrated six-burner stove, making it an excellent primary base of operations for curing hides and storing extra gear. The surrounding fields also contain orchards and outbuildings that hold valuable crafting components and clothing items.
Another vital shelter option located further north is the Thomson's Crossing community, which sits along a winding riverbank. This small rural settlement features a community hall that offers a great deal of floor space for sorting supplies and recovering your fatigue levels safely. The nearby rural store provides immediate access to canned food goods and basic tools that can help jumpstart a fresh regional run.
Strategic Transit Points and Industrial Sites
For survivors looking to gather heavy industrial resources, the Point of Disconnection serves as a notable landmark near the edge of the wilderness. Exploring these peripheral areas allows players to map out secure routes leading toward the adjacent coastal highway and mountain transitions. Keeping a close eye on your internal compass while navigating these rocky perimeters ensures that you do not accidentally wander into dead-end mountain valleys.
The Abandoned Prepper's Cache, situated near the northern rope climb, provides an excellent staging ground before attempting to transition into Timberwolf Mountain. This underground bunker is completely protected from temperature drops and always features a reliable baseline of survival loot. Managing your inventory capacity at this specific location is essential for preparing your character to tackle high-altitude climbing challenges later on.

How to Breed Rabbits in Minecraft Step by...
Breeding rabbits in Minecraft is a rewarding process that provides valuable crafting materials like rabbit hide and rabbit feet. Unlike farm animals such as cows or sheep, rabbits require specific food items and careful handling due to their skittish nature. Understanding how to locate, capture, and multiply these fast creatures will significantly enhance your survival farming efficiency.
Gathering the Required Breeding Food
Before attempting to breed rabbits, you must collect the specific items needed to attract and feed them. Rabbits in Minecraft will only enter breeding mode when fed carrots, golden carrots, or dandelions. Carrots are commonly found in village farms or dropped by zombies, while dandelions grow abundantly across grassy plains biomes.
Golden carrots offer the highest saturation value and can be crafted using gold nuggets and a standard carrot. Holding any of these valid food items in your hand will cause nearby rabbits to slowly follow you. Ensure you have at least two food items available to feed two adult rabbits simultaneously.
Locating and Capturing Wild Rabbits
Rabbits naturally spawn in several biomes, including deserts, flower forests, taiga regions, and snowy plains. Their coat colors often adapt to their environment, helping them blend into surrounding terrain. Because rabbits hop away quickly when approached, capturing them requires patience and smart planning.
To transport them safely, hold a dandelion or carrot to lure them into an enclosed pen or pit. Alternatively, you can use a lead to pull them directly into your designated farming area. Building high fences or glass enclosures prevents wild rabbits from escaping or jumping over obstacles.
Executing the Breeding Process Step by Step
Once you have secured two adult rabbits inside a protected enclosure, equip your chosen breeding food. Right-click on the first adult rabbit to feed it, which will trigger glowing heart particles above its head. Immediately repeat this action on the second adult rabbit to initiate the breeding sequence.
The two rabbits will approach each other and spawn a baby rabbit nearby. The baby rabbit will inherit the fur pattern of one of its parents, though there is a small chance it may inherit a color suited to the current biome. Once breeding is complete, the adult rabbits will enter a brief five-minute cooldown period before they can breed again.
Raising Baby Rabbits and Utilizing Drops
Baby rabbits require approximately twenty real-time minutes to naturally grow into full adults. You can accelerate this growth process by feeding the baby rabbit carrots, golden carrots, or dandelions. Each feeding reduces the remaining growth time by ten percent, allowing you to build a thriving rabbit farm rapidly.
Maintaining a dedicated rabbit farm provides essential resources for late-game survival crafting. Mature rabbits yield raw rabbit for cooking, rabbit hide for crafting leather, and rare rabbit feet used for brewing Potions of Leaping. Managing your farm effectively ensures a steady supply of useful items for all your adventures.

Tekken Tag Tournament 2 Complete Character List
Mastering the massive fighter selection in Tekken Tag Tournament 2 remains a legendary milestone for fans of competitive arena combat. Boasting one of the largest and most comprehensive selection grids in fighting game history, this title serves as a grand celebration of the franchise's deep legacy. Navigating the complete roster requires an understanding of both traditional mainstays and unique legacy console inclusions.
The Core Roster and Iconic Mainstays
The foundation of this impressive selection grid relies heavily on timeless world warriors who have defined the King of Iron Fist Tournament for decades. Powerful legacy combatants like Kazuya Mishima, Jin Kazama, Heihachi Mishima, Paul Phoenix, and Marshall Law form the strategic competitive core. Players can pair these standard favorites to create highly optimized combos and fluid tag-team transitions during intense matchups.
Beyond the primary narrative leaders, versatile archetypes like Hwoarang, Ling Xiaoyu, King, and Nina Williams add immense variety to the competitive sandbox. Each martial artist retains their signature command lists while benefiting from the updated tag mechanics introduced in this generation. Learning the intricate regional backgrounds and combat styles of these central characters provides a major advantage in competitive local tournaments.
Console Exclusives and Surprising Returns
What truly sets this specific entry apart from its arcade predecessor is the inclusion of several prominent console-exclusive characters that expanded the total roster significantly. Fan-favorite personalities like Unknown, Violet, Dr. Bosconovitch, and Miharu Hirano were integrated to give players even more freedom in team customization. These special additions brought highly unconventional movesets that challenged traditional defensive strategies.
Furthermore, ancient elemental entities and specialized mechanical combatants like Ancient Ogre, Angel, Michelle Chang, and Kunimitsu made triumphant returns to the arena stage. Their inclusion allowed long-time players to reconstruct classic tag teams that had not been playable together for over a decade. This deliberate mix of historical fan service and experimental gameplay parameters created an unforgettable playground for casual and hardcore fans alike.
Tag Synergy and Choosing Your Duo
With dozens of unique fighters available on the final selection menu, finding the perfect partnership requires extensive experimentation in the practice arena. Certain character combinations share unique tag throw animations and specialized direct follow-up attacks based on internal narrative relationships. Balancing a high-mobility pressure attacker with a defensive powerhouse often yields excellent results against aggressive opponents.
Ultimately, analyzing the immense capabilities hidden within this fighting game experience helps players appreciate the mechanical depth achieved during this classic era. Exploring the diverse options allows competitive communities to keep the legacy of tactical tag-team battles alive across modern setups. Discovering every hidden synergy remains one of the most rewarding milestones for dedicated combat enthusiasts worldwide.

Is House Flipper 2 Multiplayer And How To...
The launch of House Flipper 2 has reawakened the inner interior designer in gamers worldwide, offering advanced tools to renovate distressed properties. While the solo experience provides a deeply therapeutic and satisfying gameplay loop, many players are eager to know if they can share the renovation duties with their friends. Understanding the multiplayer capabilities of this sequel is essential for communities that love to coordinate large-scale architectural projects together.
The Current State of Multiplayer Features
As of the current release version, House Flipper 2 does not feature a traditional cooperative multiplayer mode built directly into the base campaign. The developers originally focused heavily on perfecting the physics engine and expanding the sandbox building mechanics for individual players. However, the development team has acknowledged the massive player demand for cooperative features in their official community roadmap.
While standard matchmaking is absent, players can still collaborate indirectly by sharing their custom creations. The game features an advanced sandbox mode where users can build entire residential maps from scratch and upload them to a centralized online modding platform. This allows your friends to download your customized structural layouts and continue renovating them on their own local devices.
How to Cooperate via Remote Play Options
Players looking for a synchronized experience have discovered alternative technical solutions to bridge the multiplayer gap. By utilizing platform-specific digital tools, two creators can effectively manage the same renovation project in real time. For instance, PC users frequently rely on specialized streaming software to pass controls back and forth during complex design phases.
Taking turns handling the heavy demolition or the delicate painting tasks introduces a fun, collaborative dynamic to the simulator. If you want to coordinate these sessions smoothly, using external voice applications helps teams divide their home improvement responsibilities efficiently. If you want to streamline your digital library management before launching your next big project, you can learn how to uninstall a game on Steam step by step to optimize your storage space.
What to Expect from Future Updates
The community support website established by the studio indicates that online multiplayer remains one of the most requested additions for future updates. Integrating multiple active players into a physics-heavy simulation environment presents unique programming hurdles that require extensive testing. The developers are continuously evaluating feedback to determine how to implement shared lobbies without sacrificing game stability.
In the meantime, regular seasonal content patches continue to expand the existing catalog of furniture and surface textures. These additions keep the solo renovation loop fresh while the foundation for potential shared network features is being studied. Staying connected with the official developer discussion boards ensures you will receive immediate alerts whenever testing phases for network play are officially announced.

How Long Is Chapter 5 In Red Dead...
Red Dead Redemption 2 introduces players to a massive open world filled with incredible narrative depth and detailed environmental design. As the dynamic campaign progresses, the sudden transition to a foreign land caught many fans off guard. Understanding the pacing of this specific section helps virtual adventurers manage their expectations as the Van der Linde gang faces its darkest hours.
Average Playtime for the Guarma Segment
For most players focusing purely on the critical path, this exotic chapter takes roughly two to three hours to finish. The narrative structure is tightly linear compared to earlier parts of the campaign, pushing the action forward at a much faster pace. Adventurers who prefer to rush through the core objectives can reach the conclusion in just under two hours.
However, players who take their time to absorb the atmosphere or seek out native wildlife might extend their stay slightly. Because your standard inventory and regular camp facilities are completely inaccessible, there is very little reason to linger beyond the required narrative milestones. The overall playtime remains remarkably brief when contrasted with the sprawling, open-ended segments set in the main American territories.
The Core Missions and Story Progression
This specific chapter features a modest selection of only five main story missions that chart Arthur Morgan's fight for survival alongside his closest allies. The narrative serves as a vital turning point, exposing deep cracks in leadership and forcing characters to question the direction of the gang. Every sequence moves seamlessly into the next, creating a cinematic flow that leaves very little room for traditional exploration.
The restricted nature of the environment means you will not encounter complex side activities or random stranger encounters during your stay. Instead, the gameplay emphasizes tactical combat encounters and intense scripted set pieces designed to highlight the crushing pressure facing the outlaws. This dramatic narrative shift ensures that the entire sequence feels urgent, intense, and highly focused from start to finish.
Tracking Unique Wildlife and Collectibles
Despite the lack of traditional side quests, completionists will find a few highly specific incentives to slow down during this brief chapter. The tropical setting is home to several unique bird and snake species that cannot be discovered anywhere else on the primary world map. Tracking these elusive creatures is essential for dedicated fans looking to fully satisfy the requirements of their total in-game compendium.
Attempting to study and hunt every single native species can easily add another hour or two to your total playtime. Players should exercise extreme caution, as wandering too far outside the designated mission boundaries will alert hostile local authorities. Making sure to scan the skies and dense undergrowth early on ensures you do not miss these limited-time hunting opportunities before returning home.
Visual Adaptations and Pacing Adjustments
The sudden change in setting provides a striking visual contrast to the sun-drenched plains and muddy towns players grew accustomed to during the early chapters. This section acts as a structural intermission, offering tactical freedom in combat while temporarily removing exploratory freedom. The intense narrative focus sets up the emotional stakes needed to transition into the emotional final acts of the overarching campaign.
While the sudden loss of your favorite horse and trusted gear can feel jarring, the streamlined pacing prevents the isolation from overstaying its welcome. It forces players to adapt to scarce resources and unfamiliar terrain, mirroring the desperation felt by Arthur and his companions. Ultimately, this short journey remains a memorable and essential piece of storytelling that fundamentally reshapes the future of the gang.

How To Get Fabric In Dreamlight Valley And...
Crafting unique furniture and completing character quests in Disney Dreamlight Valley often requires a steady supply of refined resources. One of the most frequently requested refined materials is Fabric, which is essential for tailoring clothes and building outdoor decorations. Understanding how to efficiently gather the necessary raw elements will help you progress smoothly through the game.
Unlocking the Sunlit Plateau Biome
To begin your journey toward gathering the necessary raw components, you must first gain access to the Sunlit Plateau. This specific biome costs a significant amount of Dreamlight to unlock, which can be accumulated by completing daily duties. Once you clear the night thorns blocking the path, you will open up new agricultural opportunities.
Inside this sun-drenched region, you will find Goofy's local stall, which serves as your primary hub for regional seeds. Upgrading this stall using your hard-earned Star Coins is highly recommended to permanently expand his available inventory. Doing so ensures you can consistently purchase the specific foundation items needed for high-quality textile production.
Sourcing and Growing Cotton Seeds
The primary ingredient required to create Fabric is Cotton, a crop that thrives naturally within the Sunlit Plateau environment. You can buy Cotton Seeds directly from Goofy's stall once it has been sufficiently upgraded by Scrooge McDuck. Alternatively, clearing wild plants in the area might occasionally yield a few free resource drops for your inventory.
After securing your new seeds, plant them in cultivated soil anywhere within your unlocked biomes to start the growing process. Watering them regularly with your royal watering can is essential, and they generally take around twenty-five minutes to mature. Harvesting the fluffy white bolls will give you the direct materials needed for the workstation.
Crafting Fabric at the Workstation
Once you have harvested enough raw crops, head over to any functional crafting bench scattered around the village. Navigate directly to the refined material tab to locate the specific recipe for creating durable textile bundles. You will discover that converting five individual pieces of raw Cotton yields exactly one piece of Fabric.
It is always a good strategy to craft this resource in large batches to save time during future village expansion projects. Many complex friendship quests demand multiple pieces of this tailored material at once, making advanced storage preparation highly valuable. Keeping a dedicated chest for refined items ensures you are always ready for unexpected character requests.
Alternative Ways to Acquire Materials
If you prefer to skip the agricultural process entirely, there are alternative methods to build up your resource inventory. Occasionally, Kristoff's fully upgraded outdoor stall will offer refined goods directly in exchange for a reasonable amount of Star Coins. Checking his daily rotating stock can save you significant time and effort when working under a tight deadline.
Additionally, some specialized character quests might reward you with pre-made crafting materials upon successful completion of their unique storylines. Interacting with the magical community and advancing your friendships frequently unlocks these hidden supply channels. Balancing both farming and purchasing strategies will guarantee that your personal valley never runs out of essential crafting assets.

ESL One Cologne 2014 Legends And Their Historic...
The ESL One Cologne 2014 tournament remains one of the most defining landmarks in the history of competitive Counter-Strike: Global Offensive. Hosted during gamescom in Germany, this historic Major brought together the global elite to battle for a massive prize pool and ultimate esports glory. The event solidified legacies and witnessed iconic tactical shifts that shaped the competitive scene for generations to come.
The Clash of Swedish Counter-Strike Titans
Ninjas in Pyjamas and Fnatic entered the tournament as the heavy favorites, carrying the pride of Swedish esports on their shoulders. While Ninjas in Pyjamas fought to reclaim their absolute dominance, the younger Fnatic roster demonstrated an aggressive, innovative tactical approach. Their inevitable progression through the brackets set up a legendary grand final that fans still discuss today.
Every map in the playoffs tested the mechanical limits and mental fortitude of these veteran players. The strategic depth displayed throughout the tournament established a blueprint for modern team coordination and utility usage. Ultimately, this intense rivalry pushed both organizations to elevate their operational standards to stay ahead of the curve.
Unforgettable Bracket Stages and Underdog Stories
Beyond the grand finalists, the tournament featured remarkable performances from international teams that defied early community predictions. Squads from North America and emerging European regions proved that the global competitive gap was closing rapidly. These intense matchups filled the arena with unprecedented energy, drawing massive viewership numbers across digital streaming platforms.
Several rosters achieved legendary status by executing dramatic comebacks when facing match point against top-tier opponents. These high-stakes moments highlighted the importance of psychological resilience during major offline events. The dramatic narratives unfolding on stage captivated millions, cementing the tournament as a benchmark for top-tier esports entertainment.
The Final Showdown and Crowning the Champions
The grand final delivered an extraordinary spectacle of tactical outplays, individual clutch plays, and raw mechanical skill. Both teams traded map victories in spectacular fashion, forcing the historic series into a tense final map decider. In the end, Ninjas in Pyjamas secured the championship trophy, sparking emotional celebrations throughout the arena.
This historic victory rewarded years of dedication and structural consistency for the veteran roster. The tournament run cemented their positions as timeless icons within the global gaming community. Their triumph at gamescom remains an inspiring reminder of what competitive dedication can achieve on the grandest stage.
The Lasting Legacy of ESL One Cologne 2014
Looking back at the event provides modern esports fans with valuable context regarding how the tactical meta has evolved. The structural choices made by tournament organizers paved the way for massive stadium events worldwide. It proved that Counter-Strike possessed the longevity and community foundation to sustain a permanent global sporting ecosystem.
Today, the tournament is remembered not just for the individual plays, but for its profound cultural impact on gaming culture. The stories of resilience, triumph, and intense rivalry continue to inspire current generations of professional players. It stands as a timeless testament to a golden era of competitive esports history.

Fire And Ice Marble Fade Complete Skin Guide
The Marble Fade finish remains one of the most visually captivating cosmetic families in modern tactical shooters, celebrated for its smooth gradients and metallic sheen. Among its many configurations, the rare variation combining strictly red and blue hues stands out as a premier tier of digital craftsmanship. Understanding the mechanics behind this specific finish can significantly protect your trading assets and elevate your inventory prestige.
Understanding the Rare Color Shift Mechanic
The appearance of a weapon finish depends entirely on a randomized seed value generated during unboxing or trade-ups. For the standard finish, a texture template containing red, blue, and yellow elements is randomly mapped onto the blade surface. When the pattern shifts perfectly to exclude all yellow tinting on the playside, collectors refer to the resulting aesthetic as a true dual-color masterpiece.
Because the exclusion of specific colors happens purely by chance, the number of eligible seed numbers is extremely limited compared to standard tricolor variations. This scarcity transforms a standard knife into a premium collector asset coveted by veteran community members. Recognizing the exact layout of the blade is critical before committing to high-tier virtual marketplace acquisitions.
Analyzing true Versus Fake Pattern Variations
Distinguishing an authentic dual-color layout from a near-miss variant is one of the most challenging aspects of trading. A genuine specimen features an unblemished border where deep crimson transitions directly into a rich sapphire hue across the visible parts of the weapon. Even the slightest hint of yellow near the handle or tip instantly downgrades the item into a less valuable category.
Traders frequently classify these near-miss items as fakes, which still carry a premium over regular finishes but cost significantly less than their perfect counterparts. Examining the blade under maximum illumination settings inside the game engine helps reveal hidden yellow hues that might be invisible on standard inspect screens. Utilizing verified community databases to cross-reference seed integers ensures complete transparency during high-value exchanges.
Evaluating Tier Classifications and Maximum Red Distributions
Not all true color balances are created equal, leading the active trading community to organize them into rigid historical tiers. The most valuable category belongs to the maximum red distributions, where the fiery crimson tone dominates the blade tip while the blue fills the remaining surface. These tier one configurations command the highest market premiums due to their striking in-game visibility during matches.
Subsequent tiers gradually feature less red coverage or shift the color boundaries closer to the middle section of the weapon. While tier two and tier three variants remain exceptionally beautiful, their market value reflects their slightly higher availability in the global item index. Knowing where a specific knife sits on this spectrum protects buyers from overpaying for lower-ranked seeds.
Market Longevity and Investment Best Practices
Liquid assets within tactical shooters often experience major price fluctuations based on patch updates and shifting player preferences. However, specialized pattern anomalies like these dual-color variants have historically maintained strong price stability due to static supply limits. Collectors treat these items as stable long-term storehouses of value rather than quick flipping opportunities.
When acquiring such a rare piece, prioritizing excellent exterior wear conditions like minimal wear or factory new is highly recommended. Cleaner finishes show less paint scraping along the edges, ensuring the color transition looks flawless during active gameplay view models. Safe trading requires using reputable platforms and verifying the exact item metadata through secondary authentication systems before concluding transactions.

Best Risk Of Rain 2 Characters Ranked For...
Risk of Rain 2 challenges players with its scaling difficulty, requiring a deep understanding of item synergies and movement mechanics to survive. Choosing the perfect survivor drastically alters your approach to combat, movement, and stage progression. Understanding which character aligns with your preferred strategic choices will significantly increase your chances of escaping Petrichor V.
High Mobility Ranged Aggression
For players who prefer dodging incoming projectiles while consistently dealing damage from a safe distance, the Commando and Huntress serve as excellent selections. The Huntress thrives on pure agility, utilizing her swift tracking arrows to clear smaller enemy groups without stopping her momentum. Meanwhile, the Commando offers a balanced toolkit that triggers item effects rapidly due to a high fire rate.
Mastering these agile survivors requires prioritizing items like Soldier's Syringe and Paul's Goat Hoof to maintain distance from elite bosses. Staying mobile ensures you never become an easy target for heavy stone golems or roaming wandering vagrants during crucial teleporter events.
High Risk Explosive Damage Specialists
Players who enjoy dealing massive burst damage at the expense of defensive capabilities will find great success with the Loader and Artificer. The Loader utilizes a grappling hook mechanic to build immense kinetic energy before unleashing devastating melee strikes that shatter high-health targets. Her innate barrier generation rewards aggressive positioning right in the center of hostile crowds.
Alternatively, the Artificer utilizes elemental spells that freeze dangerous opponents and execute low-health enemies instantly. While she lacks traditional mobility options, her ability to float above the battlefield provides a unique tactical advantage during hectic late-game encounters.
Strategic Utility and Resource Management
If you prefer a methodical approach that relies on mechanical setups, drone coordination, or calculated reload mechanics, the Engineer and Captain offer unparalleled tactical control. The Captain commands orbital strikes that can stun large crowds or provide free item hacking beacons to optimize stage economy. His defensive micro-bots protect nearby allies by automatically destroying incoming enemy projectiles.
The Engineer shifts the focus entirely toward base defense by deploying powerful stationary turrets that inherit all collected items. This specific dynamic allows you to construct impenetrable zones filled with healing bustling fungus and protective shields while staying relatively safe from direct combat threats.

God Of War 3 Cheats Complete List Of...
Guiding Kratos through his final path of vengeance against the Olympian gods in God of War 3 represents one of the most intense action experiences in gaming history. While traditional button cheat codes are absent from this installment, developers packed the game with robust built-in rewards and modifiers. Unlocking these enhancements requires players to master specific challenges and uncover hidden relics hidden across ancient Greece.
Conquering the Challenges of Olympus
The primary path to altering your gameplay experience involves completing the legendary post-game trial mode. Finishing the main campaign unlocks the Challenges of Olympus, a series of seven intense combat scenarios that test your mastery over mechanics. Each unique trial forces players to adapt to strict victory conditions, such as defeating specific waves of enemies without taking damage or controlling the local population growth.
Successfully completing all seven trials grants you access to the highly coveted Combat Arena mode. This functional feature allows players to customize their own combat scenarios by selecting wave compositions, health parameters, and enemy spawn rates. It serves as the ultimate practice ground for testing advanced combo strings and optimizing your offensive weapon rotations.
Locating the Hidden Godly Possessions
Aside from the separate challenge mode, players can discover ten hidden items known as Godly Possessions scattered across the main story map. These glowing artifacts belong to the individual gods Kratos defeats during his climb up Mount Olympus and grant passive gameplay adjustments. To activate their special powers, you must complete the game at least once and start a new playthrough on the same or lower difficulty setting.
For instance, collecting Zeus' Eagle provides players with an infinite supply of the Rage of Sparta ability to easily crush enemies. Finding Hermes' Coin yields a massive influx of red orbs to max out weapon upgrades early in the campaign. Each item significantly alters standard game rules, though activating them disables your ability to earn system achievements during that session.
Unlocking Special Costumes and Perks
Altering the appearance of the Ghost of Sparta provides a refreshing aesthetic dynamic during repeated playthroughs of this classic title. Completing the main storyline immediately unlocks the Fear Kratos skin, which drastically shifts the visual presentation into dark hues. This unique cosmetic option also carries practical advantages by doubling the overall damage output dealt by your weapons.
Additional outfits can be acquired through special edition packages or by achieving specific ranking milestones within the extra gameplay modes. Utilizing these specialized variations lets players experience the campaign with completely unique status modifiers and stat distributions. They offer excellent replay value for seasoned veterans looking to approach historical combat zones from a brand new perspective.

Golden Vow Elden Ring Ash Of War Location...
Mastering the various enhancement options in Elden Ring is essential for overcoming the brutal challenges found throughout the Lands Between. Among the most versatile tools available to players is the Golden Vow Ash of War, a unique weapon skill that provides powerful offensive and defensive capabilities. Understanding how to acquire and properly implement this skill can drastically alter your success rate against difficult bosses.
Finding the Golden Vow Ash of War
To locate this highly sought-after ability, players must venture into the northern section of Limgrave. The item is held by a specific Godrick Knight who patrolls a high ridge overlooking a small bandit encampment. This area is situated northeast of the Warmaster Shack, making it accessible early in your playthrough.
Defeating this isolated knight guarantees the drop of the skill finish for your inventory. It is important to approach the ridge carefully to avoid pulling additional enemies from the cliffs below. Securing this early gives low-level characters a substantial survivability advantage before facing major legacy dungeons.
Mechanical Advantages and Build Compatibility
The core functionality of this weapon skill revolves around granting an aura buff that increases your attack damage and overall damage negation. Unlike the incantation version, which requires a steep investment in the Faith stat, this skill can be utilized by any character template. This makes it an exceptional utility choice for pure Strength or Dexterity builds looking for an extra edge.
Applying the ash grants your weapon access to the Sacred affinity, adding holy scaling parameters if desired. However, players can also choose to retain standard physical scaling while keeping the active ability intact. This flexibility ensures that your weapon optimization remains aligned with your primary damage attributes.
Best Practical Uses in Combat
The most common and effective strategy involves placing this ability on a lightweight secondary weapon, such as a basic dagger or thrusting sword. Before entering a boss arena or engaging a difficult group of enemies, players can quickly swap to the tool and activate the aura. Once the enhancement is active, you can safely return to your primary high-damage weapon to execute your offensive rotation.
This methodology minimizes the time spent in vulnerable casting animations during active combat scenarios. It also saves valuable FP resources that can be dedicated to your primary offensive weapon skills later in the fight. Integrating this simple preparation step into your routine provides a reliable baseline for tough encounters.
Maximizing Team Efficiency in Multiplayer
In addition to enhancing the player who triggers the ability, the aura expands outward to buff nearby allies and summoned spirits. This makes it incredibly valuable for cooperative multiplayer sessions where coordinated team damage is required to burn down bosses quickly. It ensures that your entire party receives a flat percentage increase to their overall battlefield effectiveness.
Even when playing offline, your Spirit Ashes will benefit immensely from the defensive parameters provided by the golden aura. Keeping your defensive summons alive longer allows them to hold enemy aggression away from your character for extended periods. Utilizing this team-wide utility transforms complex multi-target encounters into manageable scenarios.

Persona 3 Reload Hanged Social Link Guide
Navigating the complex social landscape of Persona 3 Reload requires balancing daylight activities with crucial emotional bonds that empower your combat roster. Among the most heart-wrenching and memorable story lines in the game is the Hanged Man Arcana, which focuses on a young girl named Maiko Oohashi dealing with her parents' impending divorce. Successfully managing this relationship not only unlocks powerful fusion capabilities but also offers a deep look into resilience and youthful coping mechanisms.
Unlocking the Bond with Maiko
Before you can initiate this specific tracking operation, you must meet Maiko at the Naganaki Shrine playground during the day. The opportunity becomes available starting on May 6th, provided you have the correct items to get her attention. You will need to bring her a Weird Takoyaki from Iwatodai Station and a Mad Bull drink purchased from the dorm vending machine.
Once you present these items, she will welcome your companionship and establish the formal bond. Finding the right balance in your schedule is vital because she is typically available on Mondays, Wednesdays, and Saturdays. Maximizing your free days ensures you rank up efficiently without wasting valuable opportunities during school vacations.
Optimal Dialogue Choices and Growth
Progressing through the ranks requires careful conversational navigation to earn the maximum social link points. You should always carry a matching Hanged Man Persona in your inventory to boost the effectiveness of your answers. When Maiko expresses her distress about her domestic situation, offering a supportive and non-judgmental ear yields the best results.
For instance, encouraging her independence while validating her complex feelings about her parents helps build immediate trust. Avoid dismissing her concerns or giving overly harsh advice, as gentle reassurance matches her emotional needs perfectly. Consistently choosing these empathetic paths will accelerate your level progression and prevent stagnant hangouts.
Maximizing Late Game Scheduling
As the academic semester progresses, your time becomes increasingly limited due to exams and athletic obligations. It is highly recommended to prioritize Maiko during school exam weeks when your regular classroom peers are unavailable to hang out. This tactical scheduling allows you to keep your overall progression optimal without falling behind on other critical bonds.
If you find yourself short on points before a major rank threshold, consider visiting the shrine at night to draw a fortune. This mechanic provides a silent boost to your standing with her without passing time during the busy afternoon slots. Efficient time management here ensures you finish her narrative arc well before the winter deadlines arrive.
The Rewards of Ultimate Fusion
Reaching the maximum rank with Maiko solidifies a beautiful friendship and yields a unique key item that changes your velvet room capabilities. This item officially grants you the ability to fuse Attis, the ultimate persona of the Hanged Man Arcana. Attis possesses devastating passive skills and elemental coverages that greatly enhance your tactical options in Tartarus.
Ultimately, investing your time into this story line rewards you with both incredible mechanical power and a profound narrative conclusion. Watching Maiko grow stronger through adversity provides an unforgettable highlights in your journey. Embracing this narrative path ensures your party is fully prepared for the dark challenges waiting ahead.

Mario Kart 8 Deluxe Controls Guide
Mario Kart 8 Deluxe continues to be a staple for Nintendo Switch owners, offering fast-paced racing action that appeals to both casual families and highly competitive players. Mastering the physical inputs is the critical first step to shaving seconds off your lap times and outmaneuvering your opponents on the track. Understanding how these mechanical options function allows you to customize your configuration and adapt to the increasing speeds of higher difficulty tiers.
Basic Driving Dynamics and Button Layouts
The standard controller layout relies on simple inputs to manage your vehicle's core movements during a race. Players use the A button to accelerate forward, while the B button handles braking and reversing out of tricky corners. Managing these simple inputs efficiently ensures that your kart maintains optimal momentum across different terrain types.
For players using separate Joy-Con configurations or the Pro Controller, steering is mapped directly to the Left Analog Stick. You can also utilize the D-pad for steering adjustments if you prefer a more rigid, digital input style. Experimenting with different hardware options helps determine which layout offers the most comfortable grip for extended multiplayer sessions.
Mastering the Hop and Drift Mechanics
Securing a podium finish requires a deep understanding of the drift mechanic, which is triggered by holding down the R or ZR shoulder buttons while turning. Initiating a drift causes your vehicle to hop slightly before sliding into a controlled angle around sharp corners. Maintaining this slide fills a thematic meter that unleashes a vital speed burst once the button is released.
The duration of your cornering directly dictates the strength of the resulting Mini-Turbo boost. A short slide produces blue sparks, while a sustained turn upgrades the effect to orange sparks for an extended velocity increase. If you successfully deactivate certain steering assists, you can even achieve a purple Ultra Mini-Turbo for maximum efficiency.
Utilizing Items and Defensive Driving Techniques
Deploying offensive and defensive items effectively is handled by pressing the L or ZL shoulder buttons during a race. Pressing the button immediately launches your current item forward to disrupt rival racers directly ahead of your position. Tapping the input quickly is essential when you need to clear your inventory ahead of upcoming item boxes.
Advanced players frequently hold down the item button to trail shells or bananas behind their vehicle as a physical shield. This defensive posture automatically blocks incoming homing attacks, preserving your current placement during chaotic final laps. Mastering the timing of these deployments drastically increases your survival rate when front-running a competitive lobby.
Smart Steering and Motion Control Toggles
Nintendo included several accessibility features designed to help newer players navigate challenging tracks without constantly falling off the boundaries. The Smart Steering toggle automatically corrects your trajectory when approaching dangerous edges, though it prevents you from using advanced shortcuts. This system can be turned on or off mid-race by pausing the game and pressing the appropriate shoulder trigger.
Additionally, players can activate tilt controls to steer their vehicles using the physical motion sensors built into the hardware. While this option provides an immersive, steering-wheel feel, traditional analog inputs generally offer greater precision for high-speed maneuvering. Balancing these digital assists allows you to tailor the overall gameplay experience to match your current skill level.